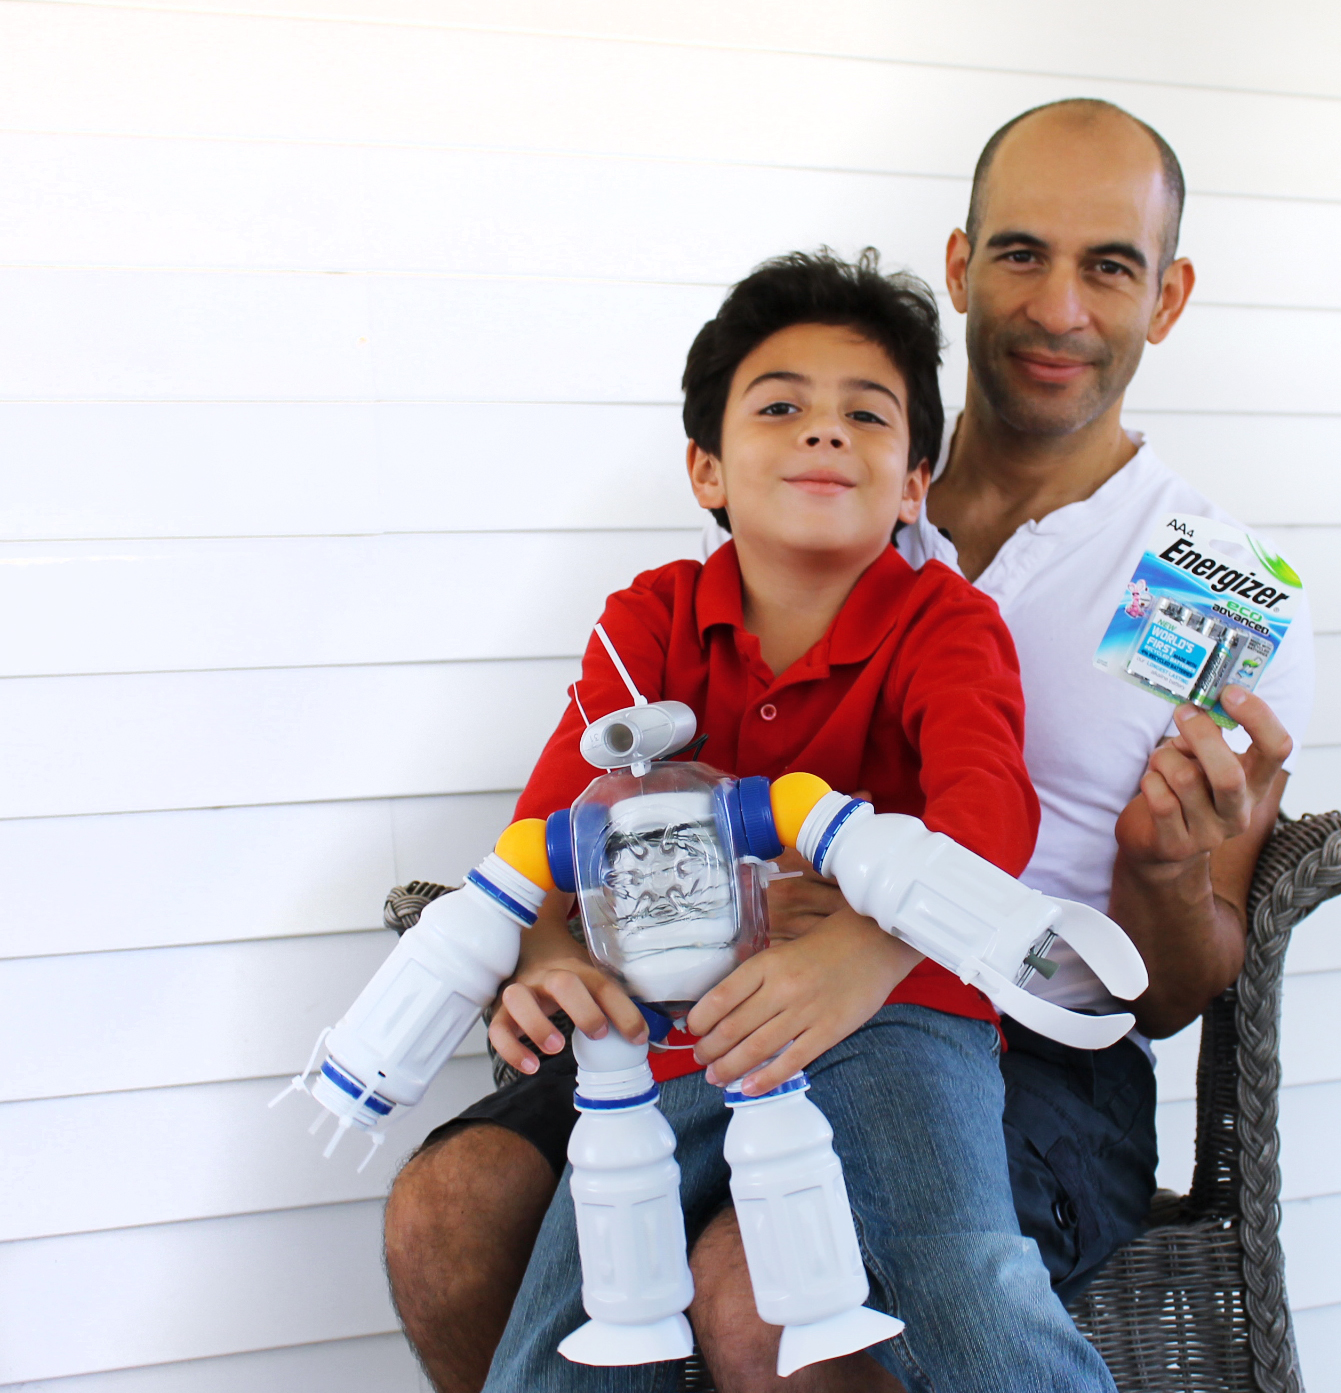
This DIY plastic bottle robot nightlight is a great craft to make with kids and a great option for reusing plastic bottles. This is also a great DIY way activity to make for Earth Day.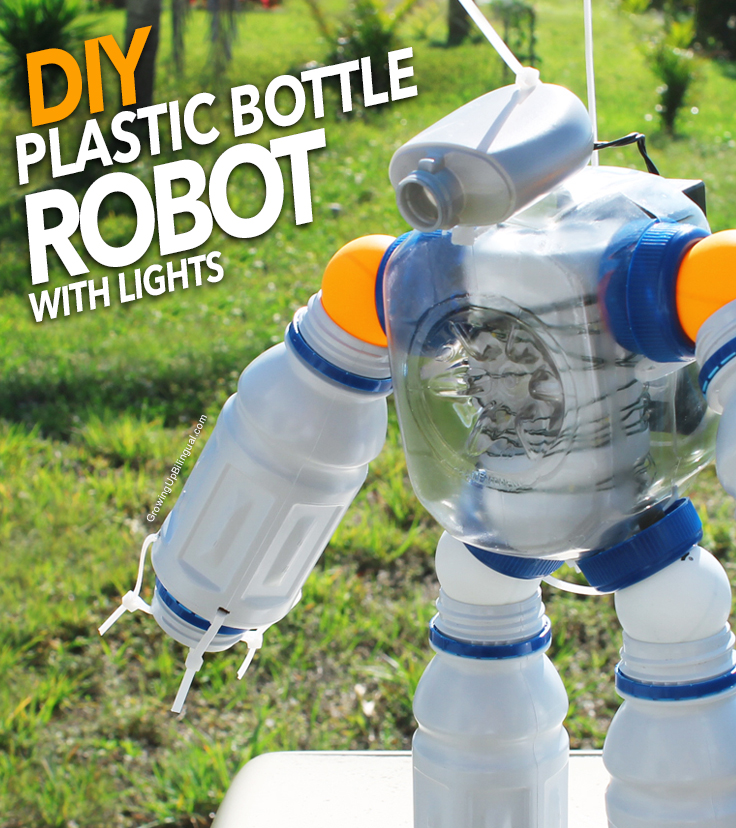
DYI Plastic Bottle Robot with Lights.For our family it’s very important to make sure that we are living in a responsible way and taking care of our environment so we always try to make green choices from recycling, to saving energy at home and finding new ways to reuse and reduce waste.
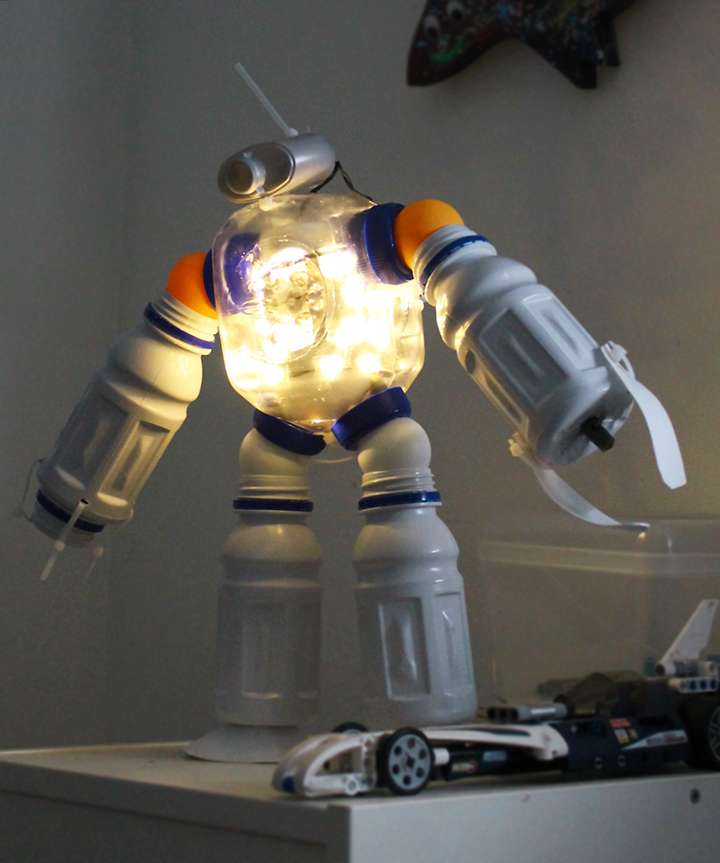
We have been teaching our kids about the importance of recycling, reusing and of not wasting energy. To motivate my children to make greener choices I wanted to create something fun with recycled materials. We had a lot of plastic bottles in our recycling bin and I decided to turn them into an upcycled plastic bottle robot. To make it super cool and so it can also serve as a night light I added some LED lights.
No Glue DIY Repurposed Plastic Bottle Robot Night Light
Materials
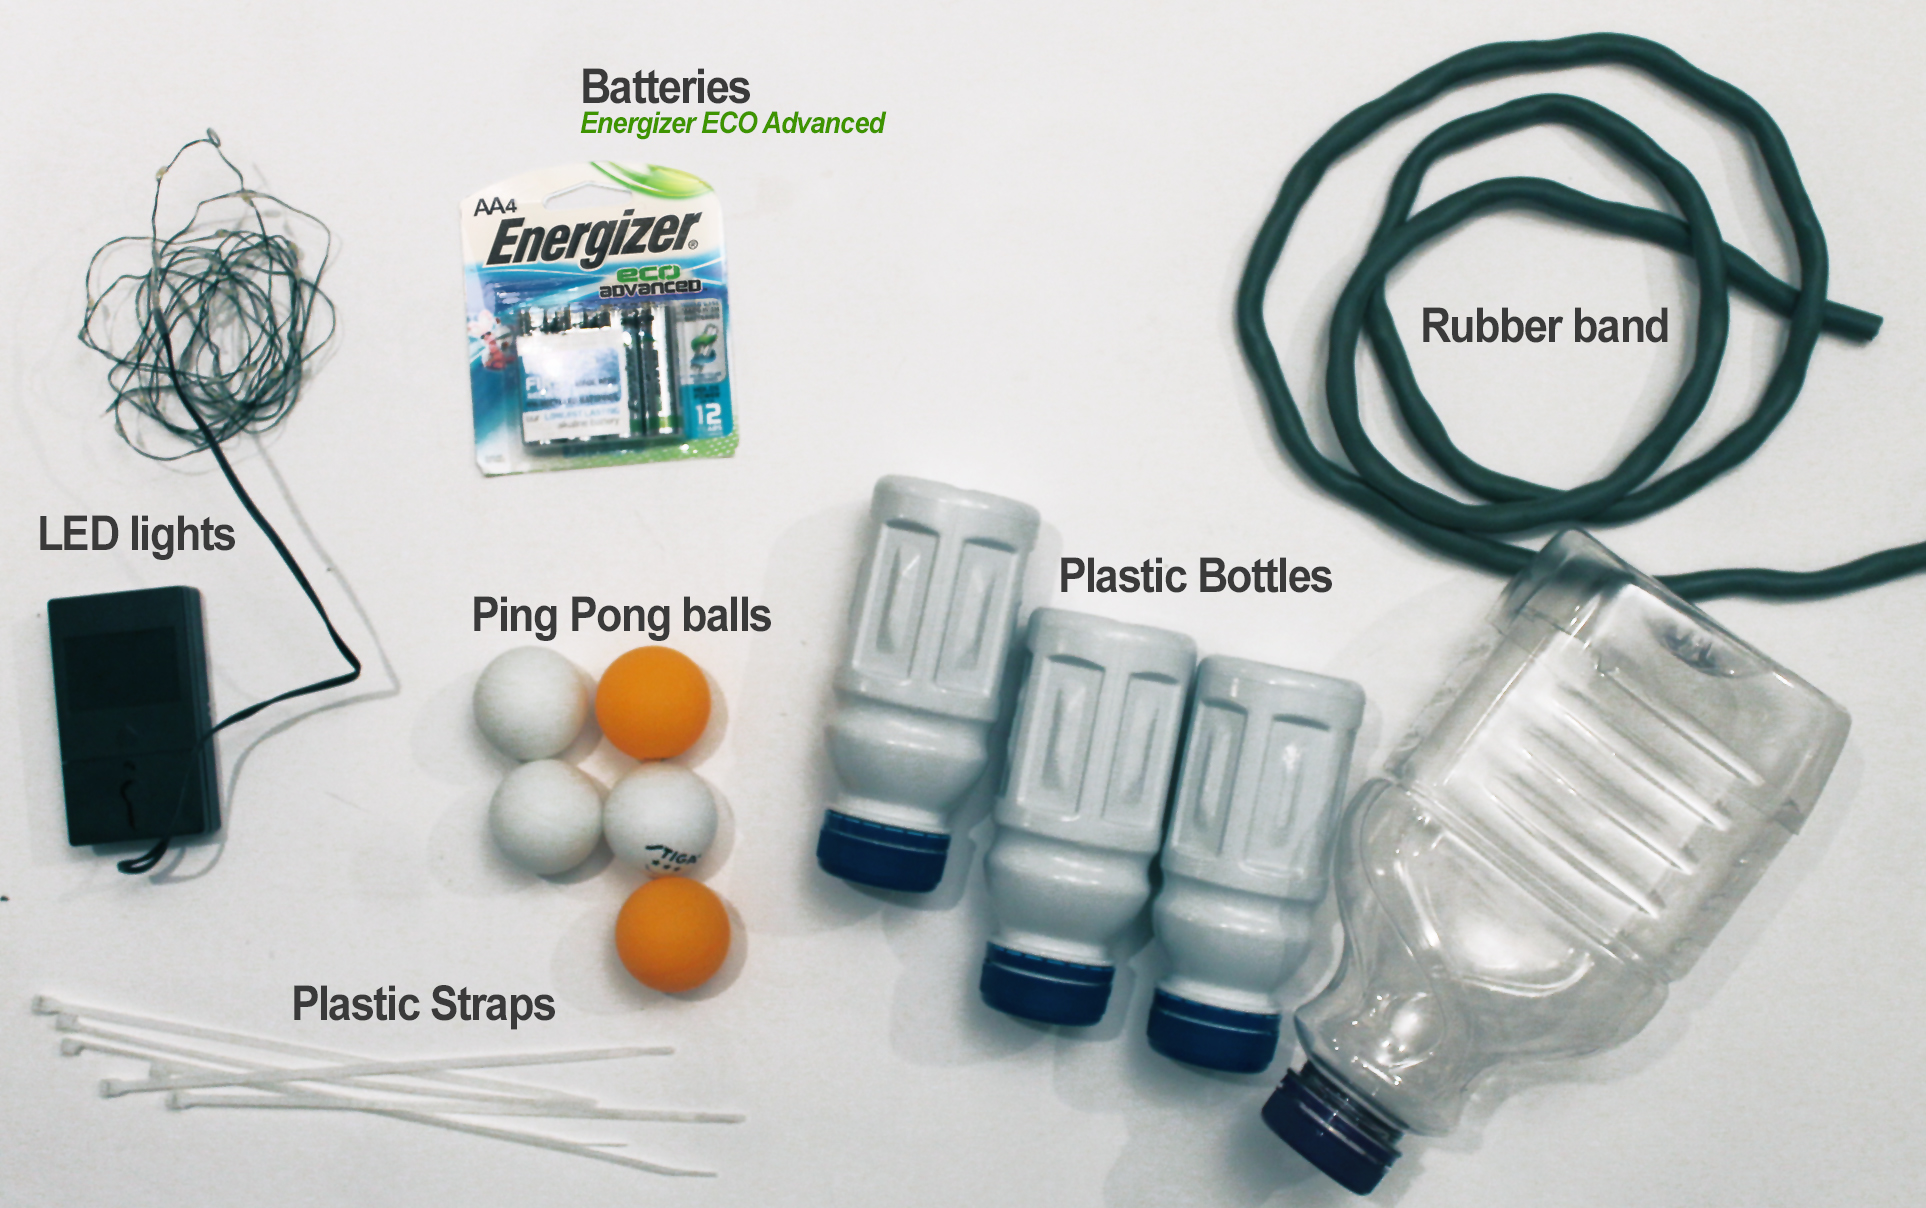
- Empty plastic bottles with caps (I used 6 white Pediasure bottles and their caps, 2 clear orange juice bottles, 1 large white half gallon milk bottle, 1 gray MiO bottle)
- LED lights
- AA Batteries
- 4 ping pong balls
- plastic ties
- 40″ thick rubber band (from an old fitness resistance training band)
Instructions
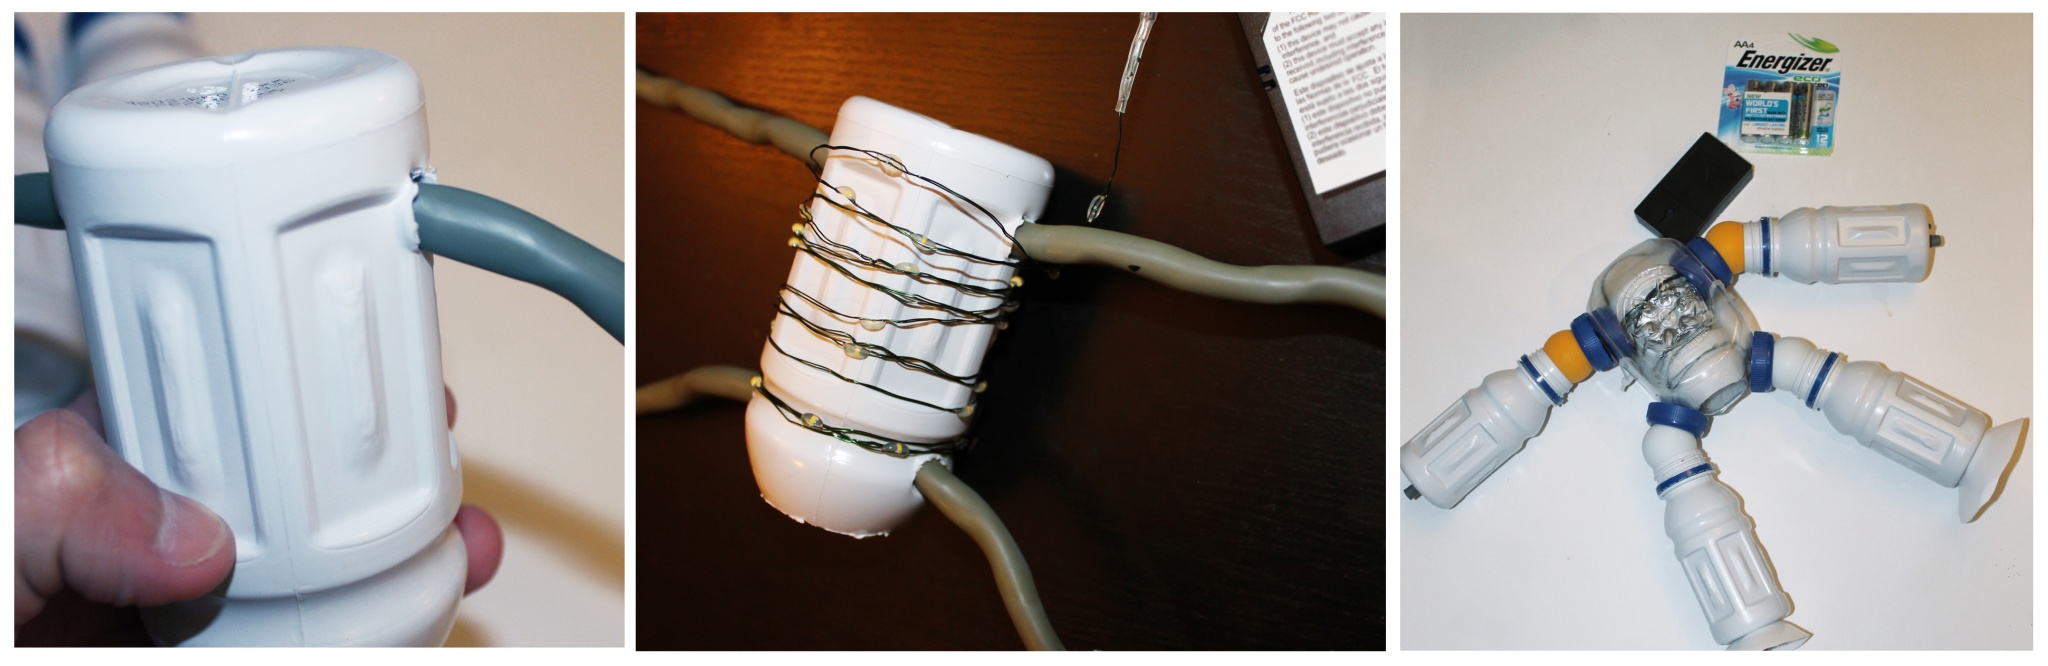
- First cut off the top of a white Pediasure plastic bottle.
- Make two holes on each side of the top third of the bottle and two holes on the sides on the bottom third of the bottle.
- Cut two 19″ thick rubber band pieces, one will go throughout the arms and the other will go through the lets of your robot.
- Insert one rubber band piece throughout the two upper holes in the white plastic bottle and the other piece through the bottom holes.
- Cut off the bottoms off of two orange juice bottles. Make a small hole in the center of one and but the cable with the led lights through the hole leaving the battery pack on the outside.
- Wrap the LED lights around the white plastic bottle.
- Bring the two bottoms of the clear plastic bottles together around the white bottle with the LED lights, these will be the chest and the back of your robot. Make sure the battery pack is in the back.
- Make two small holes on each side of the chest piece and two small holes on each side of the back piece and tie the chest and back together with two plastic ties. You should have both rubber band pieces sticking out on the sides and on the bottom of your robot’s torso, these will make the arms and legs.
- Make a hole on the bottom of 4 Pediasure bottles and on opposite sides of 4 ping pong balls.
- Remove the metal top off the 4 plastic caps (from the Pediasure bottles), this will leave only a ring with a large round hole in the center of each cap.
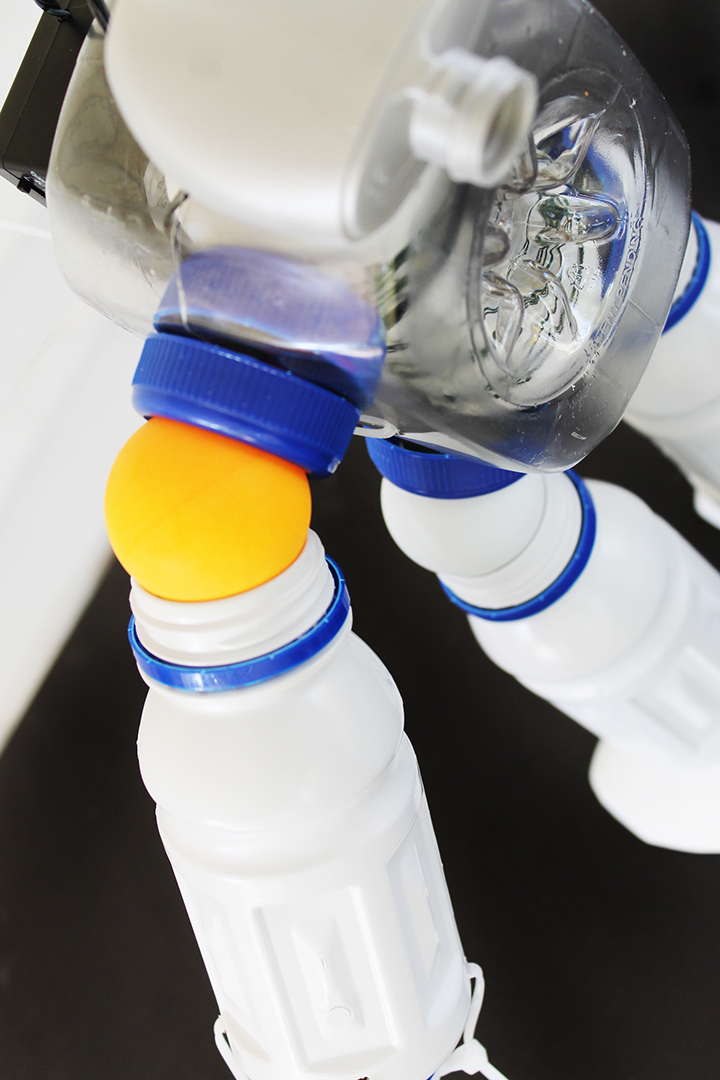
- Start with one arm and thread into the rubber band the following: one plastic cap, one ping pong ball, and one Pediasure bottle. You should have a small piece of rubber sticking out of the bottom of the Pediasure bottle. I used a large nail and inserted it through the rubber band to prevent the rubber band from going back into the bottle. Depending on the type of rubber band (mine is like a tube and very thick) you could simply make a knot at the end.
- Once you are done with one arm do the second one following the same procedure as the first.
- Make 4 small holes on opposites sides of the Pediasure bottle you are using for the second arm, make the holes as near to the bottom as you can.
- Cut off the mouth off your 6th Pediasure bottle and tie it to the end of your robot’s second arm with 4 plastic ties.
- Like in your first arm you should have a small piece of rubber sticking out of the bottom of the Pediasure bottle. Again use a large nail and insert it through the rubber band or make a knot at the end of the rubber band.
- Just like with the arms thread one bottle cap, one ping pong ball and one Pediasure bottle into each side of the rubber band piece that makes up your robot’s legs.
- Cut off two bottom corners of the milk bottle to make the feet. Make a hole on the corner and thread the pieces of plastic through each side of the rubber, these will be your robot’s feet.
- Just like the arms, you should have a small piece of rubber sticking out of the bottom of each of the robot’s feet. Again use a large nail and insert it through the rubber band or make a knot at the end of the rubber band.
- To prevent the legs from wiggling in every direction pass a plastic tie through each of the bottle caps where the legs begin and tie it together.
- Make two small holes on the top of your robot’s chest and two small holes on the bottom of the small grey MiO bottle.
- Using a plastic tie to tie the head (the grey bottle) to the top of the chest.
- Cut two pieces of plastic from the milk bottle to make the two fingers for your robot’s first arm. Tie them to the bottom of the Pediasure bottle with plastic ties, you will need to make two holes on the bottom of the bottle and a hole on the ea plastic “finger”.
- Using plastic ties tie the battery pack to the back of your robot.
- Make two small holes on the back of your robot’s head and using a plastic tie make an antenna.

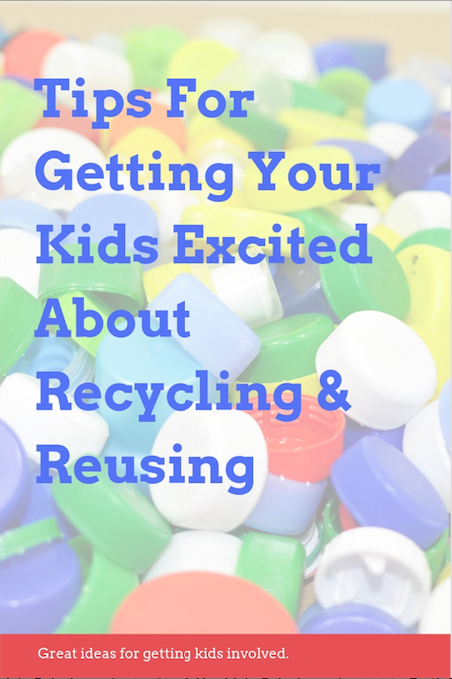
Tips For Getting Your Kids Excited About Recycling & Reusing
Make recycling, reusing and repurposing fun! When I was growing up I would make my own toys from cardboard and waste materials. Repurposing or up-cycling was not a “thing” back then and it wasn’t that my parents would not buy me toys, it was just that the toys available could not keep up with my creativity. I remember wanting a Matzinger Z (a robot from a popular Japanese cartoon I used to watch back in Guatemala) but there were no Matzinger Z toys so I decided to build one. Nowadays (and yes besides dating myself I feel like my grandpa talking) there are so many awesome toys out there but there is just something about building your own toys that give you a sense of accomplishment and when you are making something yourself there are no limits to what you can do. Don’t make it sound like a chore, motivate your children by encouraging their creativity and creating something fun and useful with materials that otherwise would go into the trash.
Make greener choices something that your children can relate to. Visit the local beach with your family and pick up bottles and other trash you find or make a trip to a local recycling plant or landfill. Showing your kids how waste affects their community and their environment at a local level makes it easier for them to understand, relate to and get motivated about making greener choices.
Teach by example. If your children see you recycling, reusing and making environmentally conscious choices they will follow in your footsteps. My kids know that every empty bottle goes in the recycling bin and that we need to turn off lights when we are not in a room, they will now even call us out if we forget to turn out the lights!
Talk to your kids about how technology can help the planet and teach them to choose green products. There are so many choices when it comes to products but not all products are created equal. We make sure to choose products and brands that use recycled products and packaging, that use Earth-friendly and green practices and ingredients and that use technology to be more efficient and create less waste. We love watching programs like Nova on PBS and my kids are so excited about how technology can save our planet that my little guy want’s to be an engineer so he can “make the world a better place”, how awesome is that!
You can find more great tips and innovative ideas on how to make greener choices at the Bringing Innovation website. Check it out!
- Keto Hot Dog and Egg Tacos - October 4, 2021
- Soccer Snack Board - April 8, 2021
- Cilantro Lime Butter Salmon Sheet Pan Fajitas - February 22, 2021


WOW!!! This is amazing! What an incredibly way to reuse and recycle!! I’m blown away by how awesome this robot is! #client
Wow and Woah. BB has sooooo pinned this! How lucky your children are to have such talented parents. Lost count on how many lessons, on many different levels, this project would make. Felicitaciones on this post, truly BUENISIMO!!! BB2U
Thanks so much! We had so much fun making this.
OOhh wow… my boy would love a robot like that. Bookmarking this DIY for later. Thanks!!!
OMG!!! Se ve super chevere Cesar!!! Te felicito!!
Gracias Diana.
That’s so awesome! Love your project, thanks for the tutorial.
Thanks Wanda, hope you get a chance to make it.
omg !! what an amazing idea! for a moment I thought that it was a toy you bought at the store … I will for sure try to make it with my little boy!!
Thanks Fernanda, it’s a lot easier that it looks.
This is hands down amazing. Fun adorable DIY to enjoy for a long while as you instill a great recycling lesson. Genius!
Thanks so much! My little guy loves it, he even slept with it.
This project is amazing!! What a creative use of used materials.
Thanks Carrie!
Holy cow Cesar, you are soooooo creative! We are going to attempt this project with our nephew this summer, not sure it will turn out as great as yours but we will give it a try!
Thanks Amy. I’ve always enjoyed making my own toys and now I get to do it with my little guy. I’m lucky: Who has this much fun at their job? Would love to see your so don’t forget to share it.
What a fun creative project for you and your son to do together. Very inspiring!
I was pretty pleased to discover this web site. I want to to thank you for ones time just for this
fantastic read!! I definitely appreciated every bit of it and i also have you saved as a favorite to see
new information on your site. Thanks!
Hi,
Just great. I’m going to try with my two boys as they liked it.
Cheers and thanks for sharing this.
Fabrizzio García
Best Reused bottles robot!I am Making This for My Science Exibition!!!
Superb!!! Keep it up!!!!!!!!!!
Se ve super chevere Cesar! Te felicito! Gracias!
increíble
Do you have a video of making this robot?
The project is amazing!! What a creative use of recycled materials.