How to Make a Unicorn Pumpkin
Looking for a magical fall or Halloween craft that’s perfect for girls? This adorable unicorn pumpkin craft is a great way to add some sparkle to your seasonal décor. Whether you use a craft pumpkin or a real one, this project is easy, fun, and full of whimsical charm. It’s ideal for girls who love unicorns, glitter, and everything pink! Follow the step-by-step instructions below to create your very own unicorn pumpkin.

Materials for Your DIY Unicorn Pumpkin :
Step-by-Step Instructions for Making a Unicorn Pumpkin:
Prepare the Pumpkin
Start by painting your pumpkin white. This will be the base color for your unicorn. You might need to apply two or three coats to ensure even coverage, especially if you’re working with a real orange pumpkin. Let each coat dry completely before applying the next one.
Tip: Use a foam brush for faster and smoother application. If you’re using a craft pumpkin, remove any stickers or residue before painting.

Make the Unicorn Horn
- Prepare the Clay: Start by breaking off two pieces of air-dry or sculpting clay, about the size of golf balls. Knead each piece between your fingers until the clay softens and becomes smooth. This helps make the clay easier to shape and ensures the horn will be free of cracks.
- Roll the Clay: Once the clay is soft, roll each piece into a ball. Then, place one of the balls between your palms and roll it back and forth, pressing gently, to form a long, snake-like roll. The roll should taper slightly so that one end is thinner than the other, giving it the shape of a cone. Do the same with the second ball of clay, creating two long rolls.

- Shape the Horn: Take the two clay rolls and pinch the thinner tips together at the top. Slowly and carefully twist the two rolls around each other to form the spiral shape of a unicorn horn. Keep twisting until you reach the base, making sure the horn has a nice spiral and is evenly shaped.

- Secure the Horn: Insert a small stick (like a toothpick, skewer, or chopstick) into the base of the horn. This will help secure the horn in place when you attach it to the pumpkin and prevent it from collapsing while drying.

- Dry the Horn: To ensure the horn dries evenly without getting flattened on one side, insert the stick into something that will hold the horn upright while it dries. You can use a foam block, an old shoebox with a hole poked in the top, or even a cup filled with rice or sand. Make sure the horn is suspended so it doesn’t touch any surfaces.

- Drying Time: Allow the horn to dry completely according to the clay manufacturer’s instructions. Depending on the clay, this could take several hours to overnight. Make sure it’s fully hardened before moving on to the next step of painting and decorating!
Create the Unicorn Ears
Take your air-dry clay or sculpting clay and mold it into two small ear shapes. Each ear should resemble a triangle with rounded edges. Make sure the ears are proportional to the size of your pumpkin—about 1-2 inches tall should work well.
Once the ears are shaped, let them air dry completely (this could take a few hours or overnight, depending on the type of clay).

Paint the Ears and Horn
Once the clay has dried completely, it’s time to give your unicorn horn a magical touch with gold glitter paint. Use a small brush to carefully coat the entire horn, making sure to cover all the nooks and crannies of the spiral shape you created earlier. You might want to apply two coats of gold glitter paint to get a bold, shiny finish. Be sure to let the first coat dry before adding the second one so the paint doesn’t smudge.

For extra sparkle, you can take it a step further by adding a layer of gold glitter glue on top of the dry paint. This will give the horn an even more dazzling effect and add texture, making it look more magical. Use the glitter glue sparingly to avoid clumps, and let it dry completely before moving on to the next steps. This extra layer will make the horn really stand out as the centerpiece of your unicorn pumpkin!

Paint the ears with white paint, and then use pink paint to fill in the centers, creating that classic unicorn ear look. Let everything dry.
Attach the Horn and Ears
Once your horn and ears are dry and painted, it’s time to attach them to your pumpkin. Carefully insert the stick in the bottom of your horn into your pumpkin stem, you can open a small home first to make this easier. You can also place the horn to the side of the stem if you want.
Using hot glue, affix the horn to the top of the pumpkin stem or directly above it. If the stem is curved cut it so that the stem has a flat end and it’s easier to attach the horn. Then, attach the ears on either side of the horn, slightly angled outward to give the appearance of a unicorn head.
Decorate the Stem
Paint the pumpkin stem with gold glitter paint to blend it with the horn. This will give your pumpkin a cohesive, magical look. If you’re using a craft pumpkin without a prominent stem, you can glue the horn and ears directly to the top surface of the pumpkin.

Add Flowers
Now it’s time to give your unicorn pumpkin a beautiful flower crown! Start by gathering your artificial flowers. I used a combination of white flowers along with flowers in a few shades of pink to create a soft, magical look. I also added a few artificial leaves to give the crown a more natural touch. Feel free to mix in some other colors, like light purples or pastels, to complement your unicorn’s color scheme.

Prepare the Flowers
Begin by trimming the flower stems down to about an inch or less, depending on the size of your pumpkin. This will make it easier to glue the flowers directly onto the pumpkin without bulky stems getting in the way. You can use a pair of scissors or wire cutters to carefully snip the stems. Before you glue anything down, lay out your flowers around the base of the unicorn horn to plan the arrangement. Start with larger flowers and then fill in the gaps with smaller flowers and leaves. I recommend placing the larger white flowers first and spacing them evenly around the horn. Then, add the pink flowers in various shades to create a balanced, layered look. Finally, tuck in the leaves around the edges for a more organic feel.

Glue the Flowers
Once you’re happy with the arrangement, it’s time to start gluing. Using your hot glue gun, apply a small amount of glue to the base of each flower, one at a time, and carefully press them into place around the unicorn horn. Be sure to work quickly, as hot glue dries fast.

Start with the larger flowers at the center and gradually work your way outwards, filling in with smaller flowers and leaves. You can overlap them slightly to make the crown look full and lush. Start with by glueing the flowers around the horn and

Final Adjustments
After all the flowers and leaves are attached, take a step back and look at your unicorn pumpkin. If you see any gaps, feel free to add a few more small flowers or leaves to complete the look. The key is to create a balanced, even crown that enhances the unicorn horn and adds a magical touch to your pumpkin.
Draw the Unicorn’s Face
With a thin brush and black paint, draw two closed eyelids with long lashes in the center of the pumpkin. If you prefer, you can use a Sharpie marker to draw the eyelashes for better control. Make sure the lashes are long and curvy, giving your unicorn a soft, dreamy expression.

Add Blush to the Cheeks
Using your pink paint and a small brush, add two rosy pink circles on each side of the face, just below the eyes. This will give your unicorn a cute and friendly look.

Final Touches
Once everything is dry, take a moment to admire your unicorn pumpkin! You can add any final touches, such as more glitter glue on the flowers or a little sparkle on the cheeks.
Tips and Variations for Your Unicorn Pumpkin Craft:
- Clay Alternatives: If you don’t have clay, you can use felt to create the ears or horn. Cut out ear shapes from white and pink felt, and for the horn, roll a piece of gold paper or fabric into a cone.
- Glitter Options: If you love extra sparkle, feel free to coat the entire pumpkin with a light layer of glitter paint or sprinkle loose glitter over wet glue. Or you can just add gold glitter paint to the horn instead of the gold acrylic paint.
- Color Variations: While pink and gold are traditional unicorn colors, you can customize your unicorn pumpkin with pastel blues, purples, or even rainbow colors for the horn or flower crown.
- Use a Craft Pumpkin: Craft pumpkins are great because they last longer than real ones, allowing you to use this magical decoration year after year.
- Personalization: Add your child’s name on the back or bottom of the pumpkin for an extra personal touch.
This Unicorn Pumpkin Craft is a perfect way to get into the fall spirit with a dash of sparkle and creativity. It’s easy to make and sure to bring smiles to everyone who sees it!
Other Cute Craft Ideas for Girls
- Easy Paper Roll Llama Craft: This simple craft involves making a llama-shaped mini piñata, teaching kids about the significance of llamas in Andean culture. It’s a fun way to combine crafting with cultural education during Hispanic Heritage Month.
- Cute Mermaid Craft Made With Toilet Paper Rolls: The mermaid paper roll craft is a fun and easy DIY project for kids, using toilet paper rolls, cardstock, and pastel-colored wool to create adorable mermaids. With simple materials like scalloped paper strips for scales and a star anise garnish for extra flair, this craft allows children to get creative while making their own whimsical mermaid characters. It’s a perfect activity for playdates, rainy days, or a mermaid-themed party!

Other Fall Craft Ideas
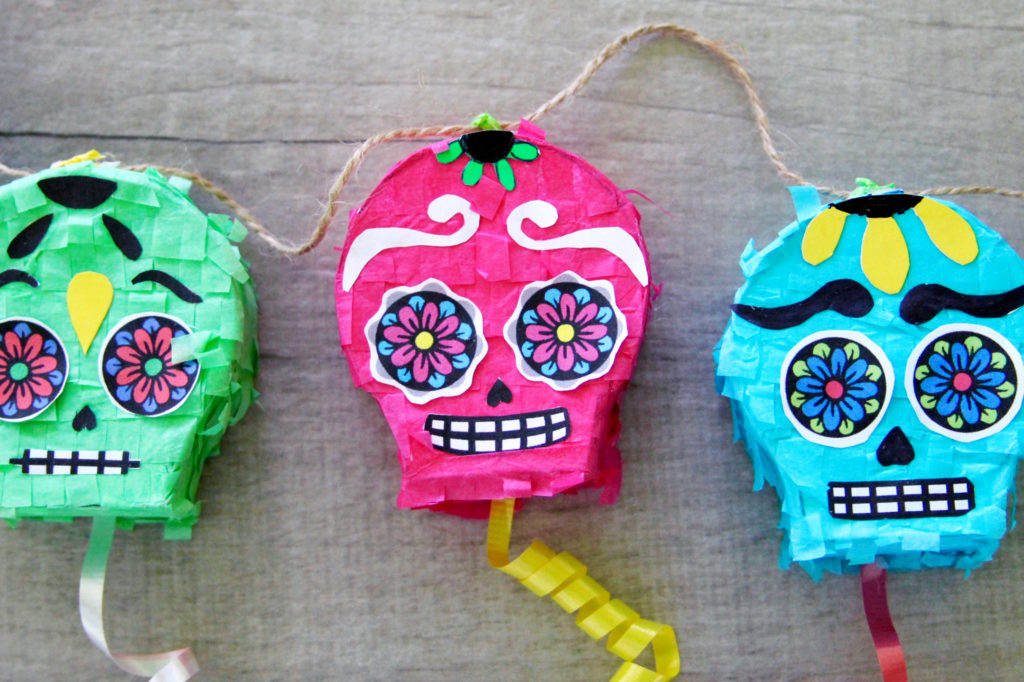
Easy Day of the Dead Craft for Kids: Celebrate Día de Los Muertos with these easy Day of the Dead crafts for kids! On November 1st and 2nd, we honor the lives of those who have passed and swap the mourning with a celebration of life. From sugar skull piñata garlands to easy and fun paper crafts like a sugar skull quilling craft.