This post is also available in: Español
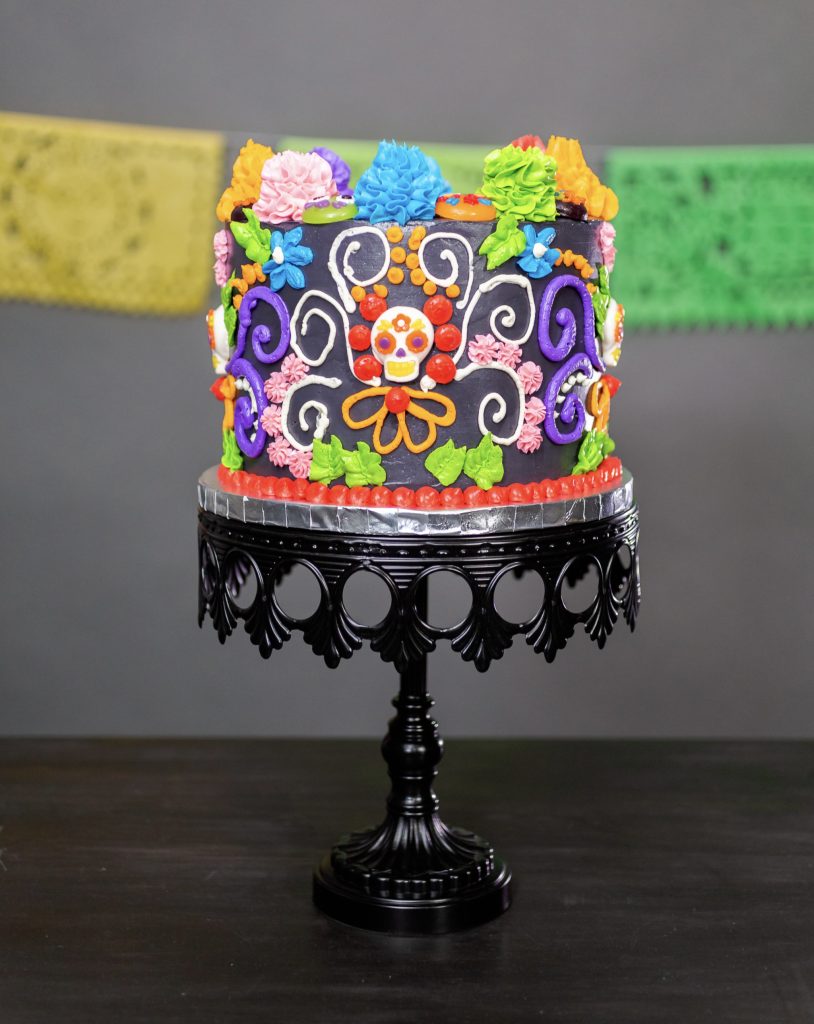
This easy Day of the Dead cake with buttercream frosting recipe is just what you need to create a stunning Día De Los Muertos chocolate cake. You don’t have to be an experienced baker to make this amazing sugar skull cake, just follow the step by step instructions!
If you’re looking for beautiful Day of the Dead cake ideas and recipes you will surely love this chocolate sugar skull cake. Aside being delicious the chocolate cake and colorful frosting layers and the bright and cheerful sugar skull inspired cake decorations create a fun and festive look that makes it perfect for any Day of the Dead party.
How is El Día De Los Muertos Celebrated?
Día De Los Muertos, or Day of the Dead party is a holiday celebrated on November 1st and 2nd. Families come together during this time to celebrate and remember their loved ones who have passed away. It’s a vibrant and lively holiday filled with lots of marigolds, colorful decorations, , traditional Day of the Dead foods, and heartfelt ceremonies.
Every year we prepare for el Día De Los Muertos by setting up our ofrenda with photos of my grandparents. We decorate the altar with Day of the Dead flowers as well as pan de muerto. We also like to make Day of the Dead crafts with the kids and we use these to decorate the altar. But one of our favorite things about the this tradition is remembering our loved ones through by cooking together. Not only do we cook traditional Day of the Dead recipes but we also like to make fun Day of the Dead recipes for kids.
The Meaning of Sugar Skulls
Sugar skulls, or calaveras, are one of the most recognizable symbols of Día De Los Muertos. These elaborately decorated skulls are not meant to be sad; they’re joyful and artistic representations of those who have passed on. Sugar skulls feature vivid colors, intricate designs, and the names of loved ones. They play a significant role in the celebration, from decorating altars to sweet treats.
Easy Day of the Dead Cake Recipe With Buttercream Frosting
In this article, we’ll guide you through the process of making a stunning Day of the Dead chocolate cake using buttercream frosting and adorned with colorful sugar skull designs. Whether you’re an experienced baker or new to the kitchen, this simple Day of the Dead cake recipe is perfect for everyone. We’ll show you how to infuse the spirit of this beloved Mexican holiday into a delicious and visually impressive dessert that will delight your friends and family. So, let’s begin this delightful culinary journey inspired by the Day of the Dead!
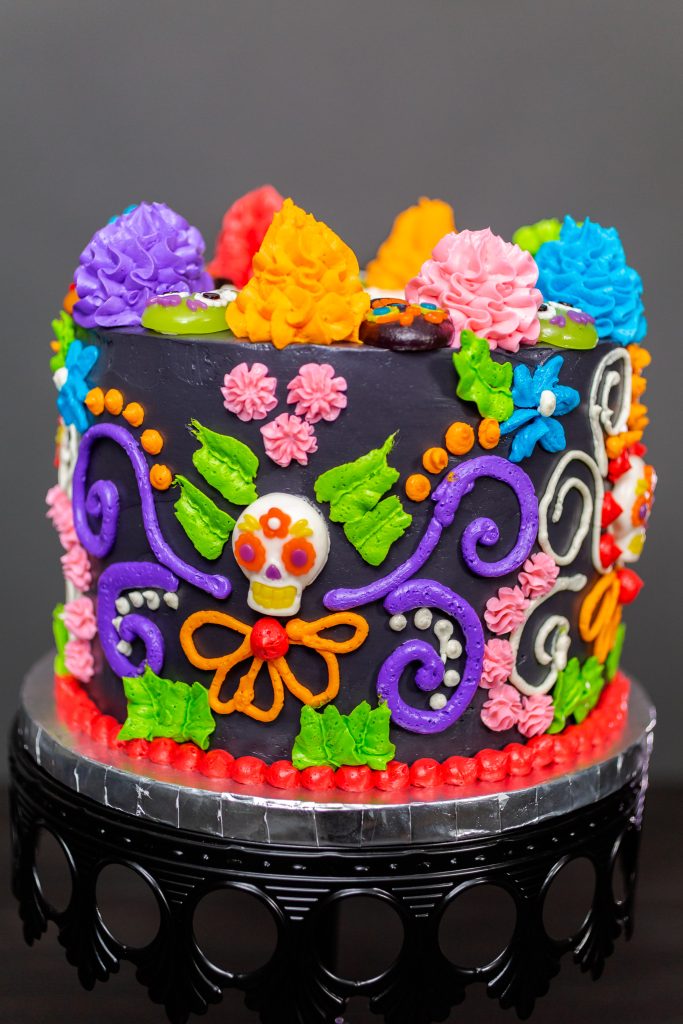
Creating a jaw-dropping Day of the Dead cake is easier than you think, even if you’re not a seasoned baker. Our step-by-step cake recipe from scratch will guide you through making a stunning dessert featuring five vibrant layers of buttercream frosting atop a dark, dramatic cake. With buttercream frosting as your artistic medium, you can make this cake a work of art that’s both delicious and visually captivating.
Drawing a Design For Your Cake
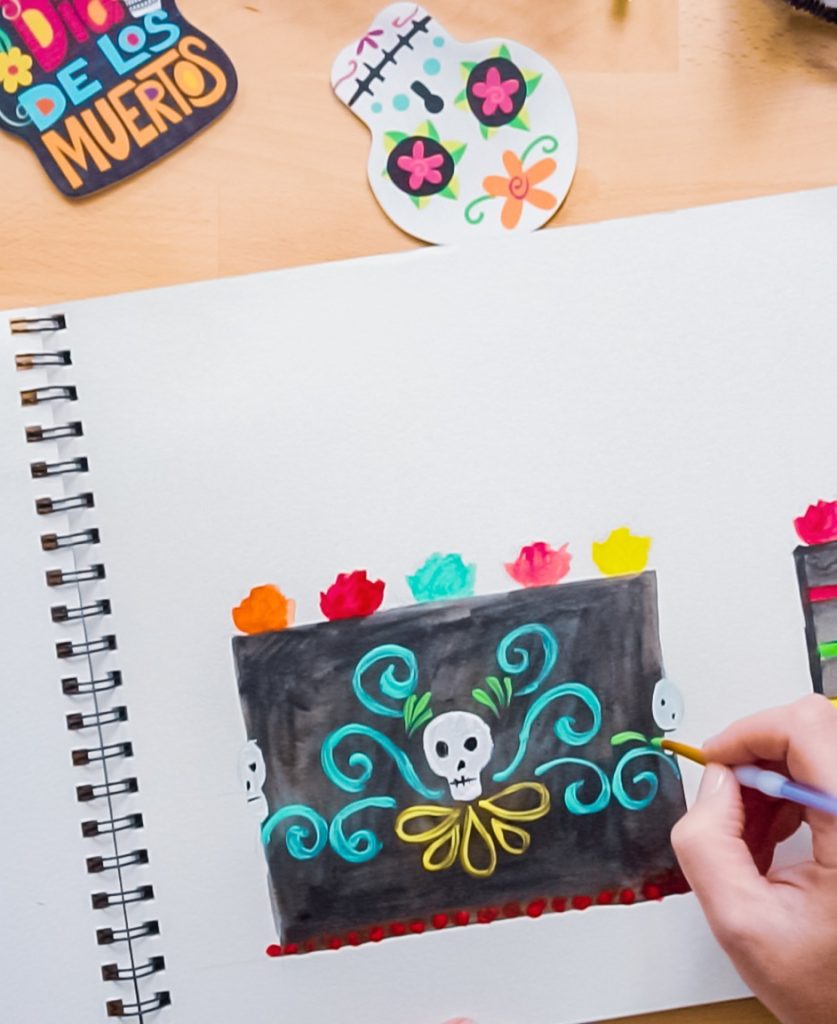
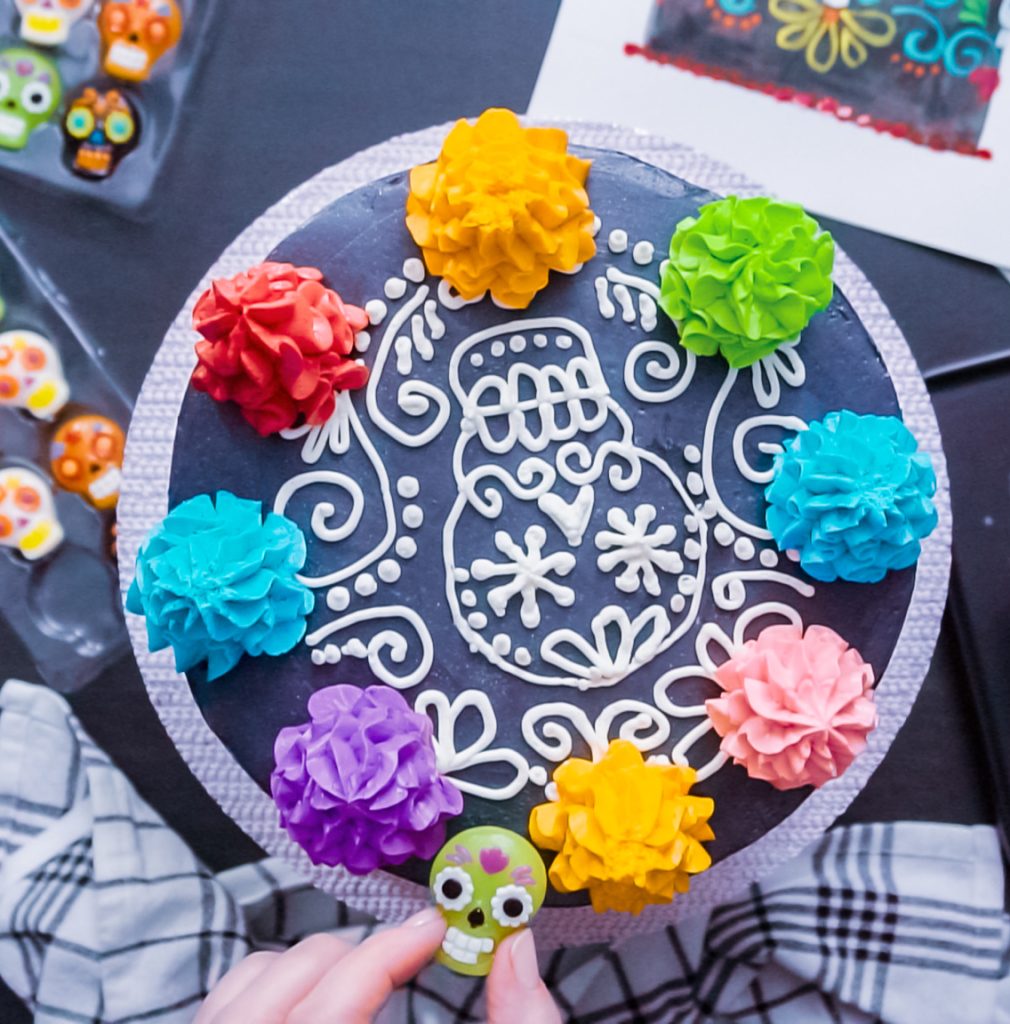
But before you dive into the baking adventure, we encourage you to start with a creative warm-up: drawing the intricate sugar skull designs that will adorn the cake’s top and sides. This will serve as your visual guide and will help you ensure your cake looks stunning when finished. You can copy the design on this cake or make your own.
Ingredients for your Day of the Dead Cake:
For the Chocolate Cake Batter:
- 4 cups all-purpose flour
- 3 1/2 cups granulated sugar
- 1 1/2 cups unsweetened cocoa powder
- 3 tsp baking powder
- 3 tsp baking soda
- 2 tsp salt
- 4 eggs
- 2 cups buttermilk
- 1 cup vegetable oil
- 4 tsp vanilla extract
- 2 cups boiling water
For the Buttercream Frosting:
- 6 cups unsalted butter, softened
- 12 cups powdered sugar
- 1/2 cup heavy cream
- Assorted gel food colors (black, red, orange, green, blue, purple, and pink )
For Decoration:
Step-by-Step Instructions for you Dia de los Muertos Cake:
1. Prepare the Cake Layers:
- Preheat the Oven: Preheat your oven to 350°F (175°C). Grease and flour five 9-inch round cake pans. You can also line the bottoms with parchment paper for easier removal.
- Sift Dry Ingredients: In a large mixing bowl, sift together the all-purpose flour, unsweetened cocoa powder, granulated sugar, baking powder, baking soda, and salt. Sifting helps remove lumps and ensures even mixing.
- Combine Wet Ingredients: In another bowl, whisk together the eggs, buttermilk, vegetable oil, and vanilla extract until well combined.
- Mix Wet and Dry Ingredients: Gradually add the wet ingredients to the dry ingredients, mixing until the batter is smooth and well combined. Be sure not to overmix; just mix until the ingredients are incorporated.
- Add Boiling Water: Carefully add the 2 cups of boiling water to the batter and mix until it’s fully incorporated. The batter will be thin, but this is normal.
- Fill Cake Pans: Divide the cake batter evenly among the prepared cake pans. Smooth the tops with a spatula to ensure even baking.
- Bake: Place the cake pans in the preheated oven and bake for approximately 30-35 minutes, or until a toothpick inserted into the center of each cake comes out clean. Baking times may vary slightly depending on your oven, so keep a close eye on the cakes.
- Cool: Remove the cakes from the oven and let them cool in the pans for about 10 minutes. Then, transfer them to a wire rack to cool completely.
Now you have your chocolate cake layers ready to be assembled and frosted.
2. Make the Buttercream Frosting:
- In a large mixing bowl, beat softened butter until creamy.
- Gradually add powdered sugar and heavy cream, mixing until the frosting is smooth and fluffy.
- Divide the frosting into seven bowls: one for black frosting, one for white frosting and five for tinting with the gel food colors to match the cake layers (I used pink, green, orange, purple and red)
3. Assemble the Cake:
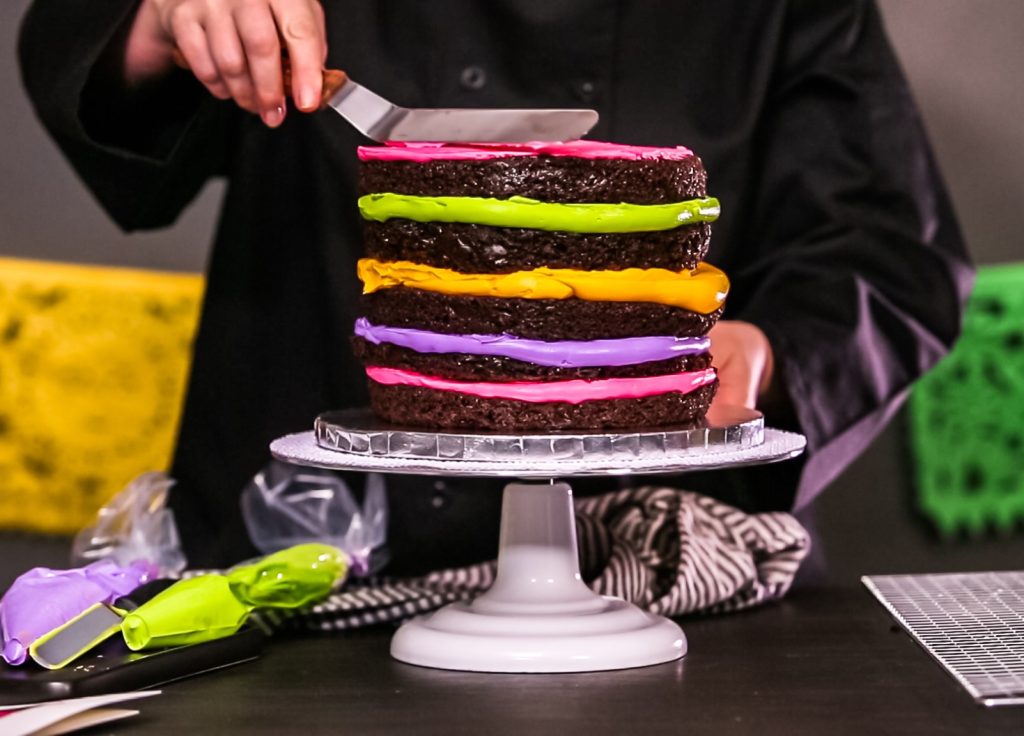
- Start with one black cake layer as the base.
- Spread a layer of frosting on top of it.
- Place the next black cake layer on top and repeat until all layers are stacked, creating a stunning contrast between the black cake and colorful frosting.
4. Crumb Coat and Chill:
-
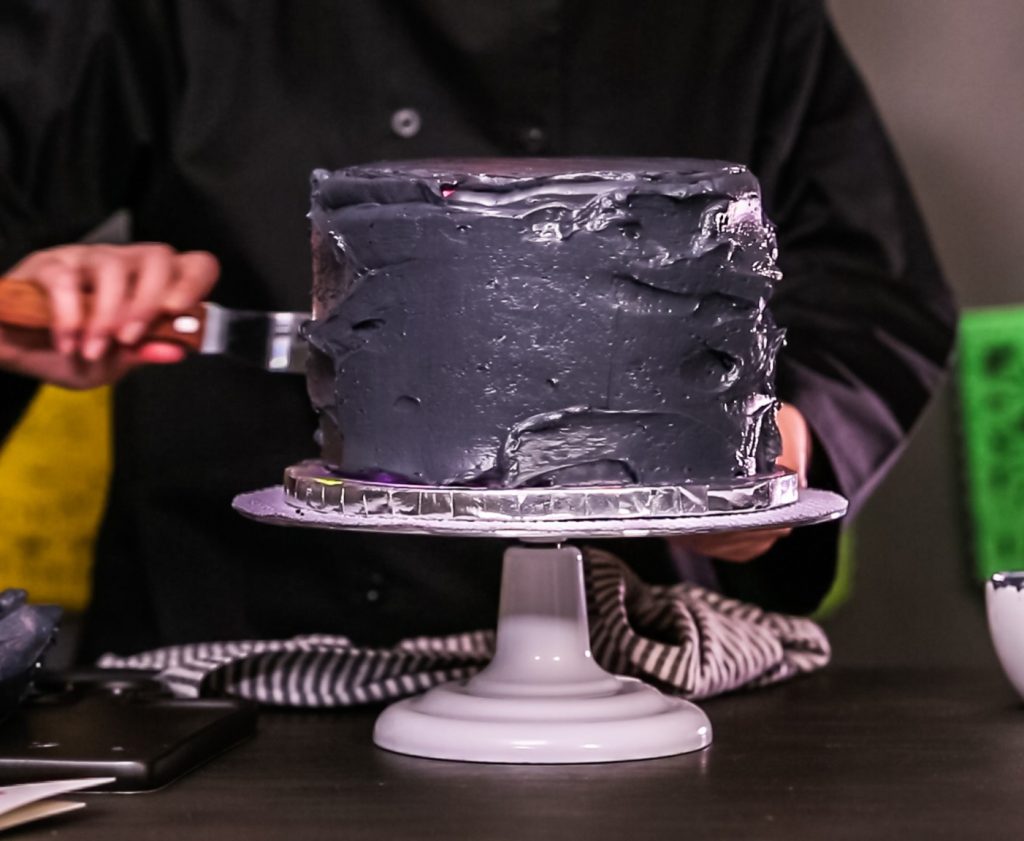
Apply a thin layer of black frosting all around the cake (this is the crumb coat). Chill the cake for 30 minutes to set the frosting.
5. Frost with Black Buttercream:
-
Cover the entire cake with black buttercream frosting to create a sleek, dark canvas.
6. Decorate your Day of the Dead Cake:
-
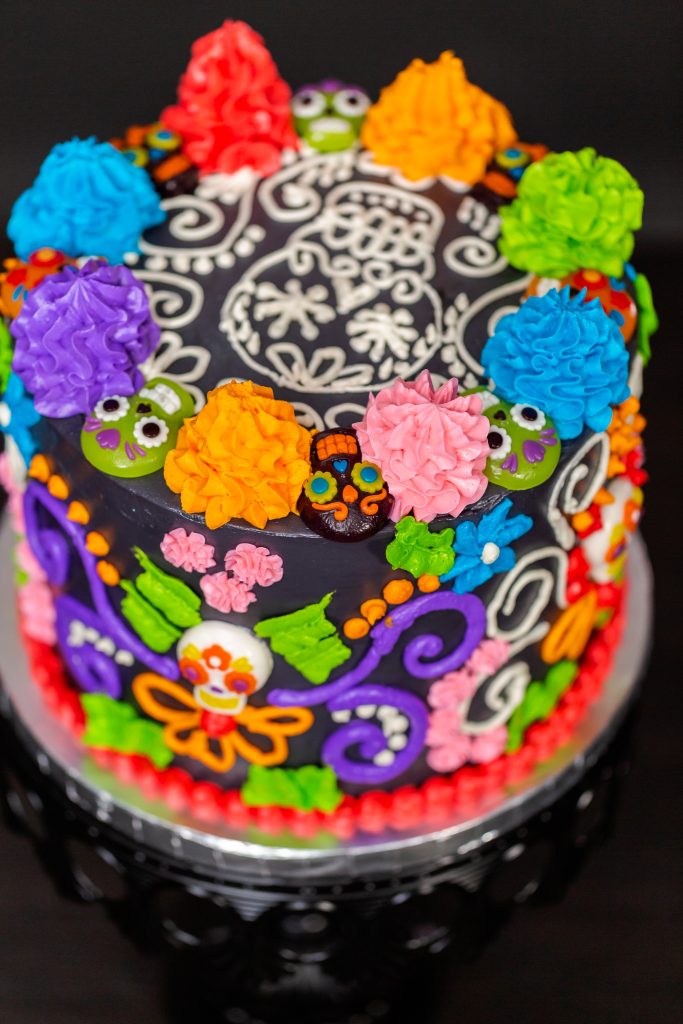
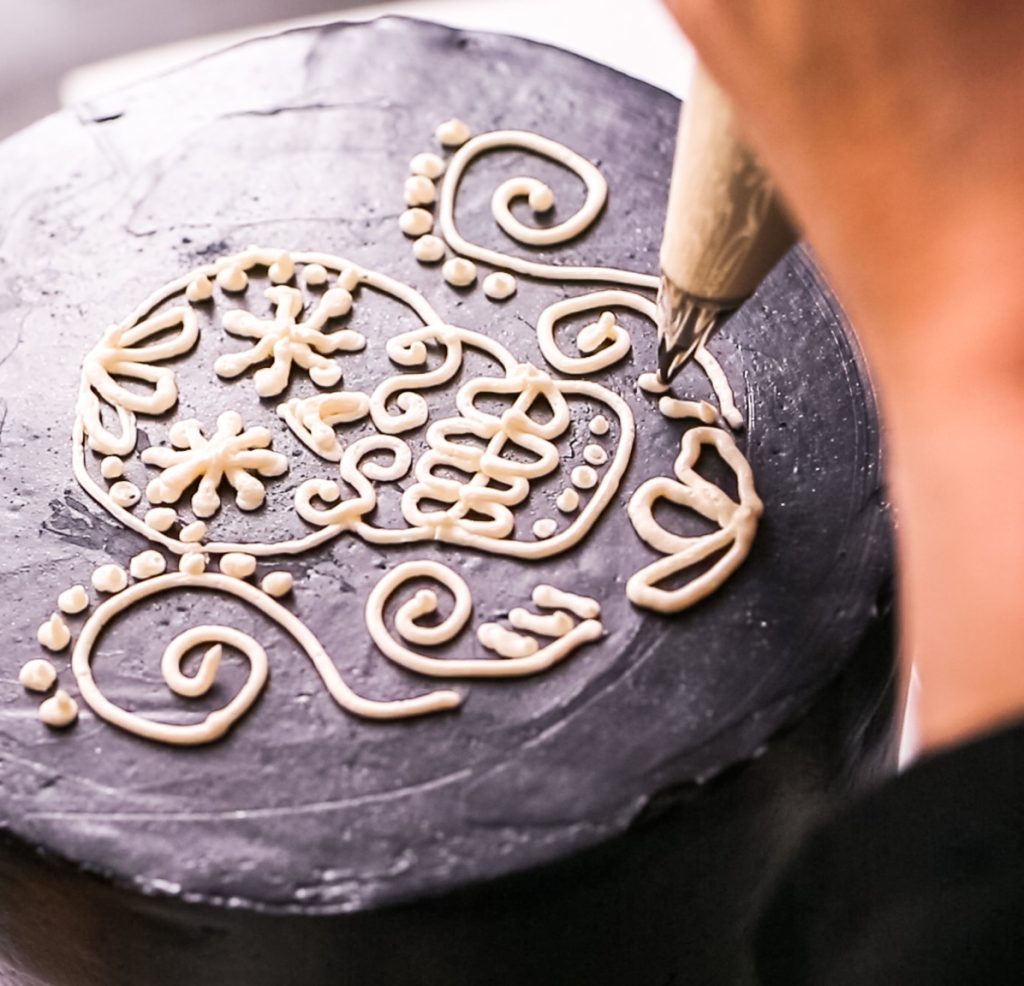
Make the white designs on the top of the cake: Base yourself on the design you created on paper. For this design use the white buttercream and a small round piping tip.Start by piping the outer shape of the sugar skull in the center of your cake. Then decorate the inside of the sugar skull adding eyes, a mouth and noise as well as some decorations like scrolls, dots and flowers. Then decorate around the sugar skull design again using different designs like flowers, scrolls, dots and stars.
-
Pipe the border on the base of your cake. This cake has a pearl border but you can choose other types of borders like a shell border or a rosette border.I like to put the border before I decorate around the cake so that I don’t risk messing up any of the decorations if I brush against the cake with my piping bag. The border is a lot easier to fix if there is a mishap.
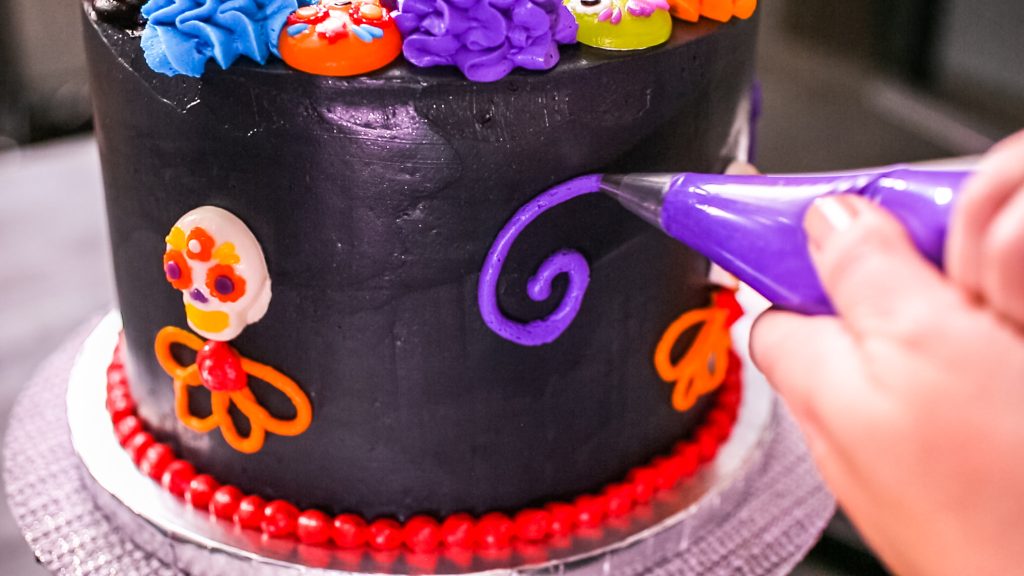
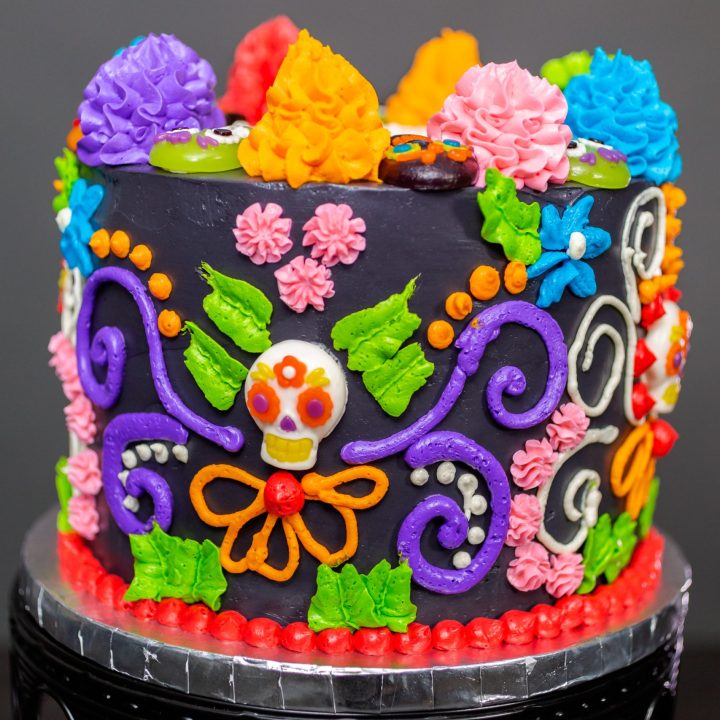
- Decorate the sides of your cake. To decorate the sides of the cake use buttercream in different colors. As you did with the top of the cake you will want to have your design on paper first so that you can follow it.
- Start placing sugar skull cake decorations. Place one on the front of the cake, another on the back of the cake and one on each side. These small sugar skull cake decorations served as the starting point and the focal point for the rest of the decorations.
- Pipe your decorations. Use your sugar skulls as the focal points then decorate around them using different piping techniques including dots, rossetts, stars, flowers and combining them with loose scrolls and flower drawings.
- Finish decorating the top of your cake. Pipe large swirls on the top. Using different colors of buttercream frosting pipe large swirls or stars. Leave some spade in between them. Don’t worry if part of the swirls covers some of the design on the top of your cake.
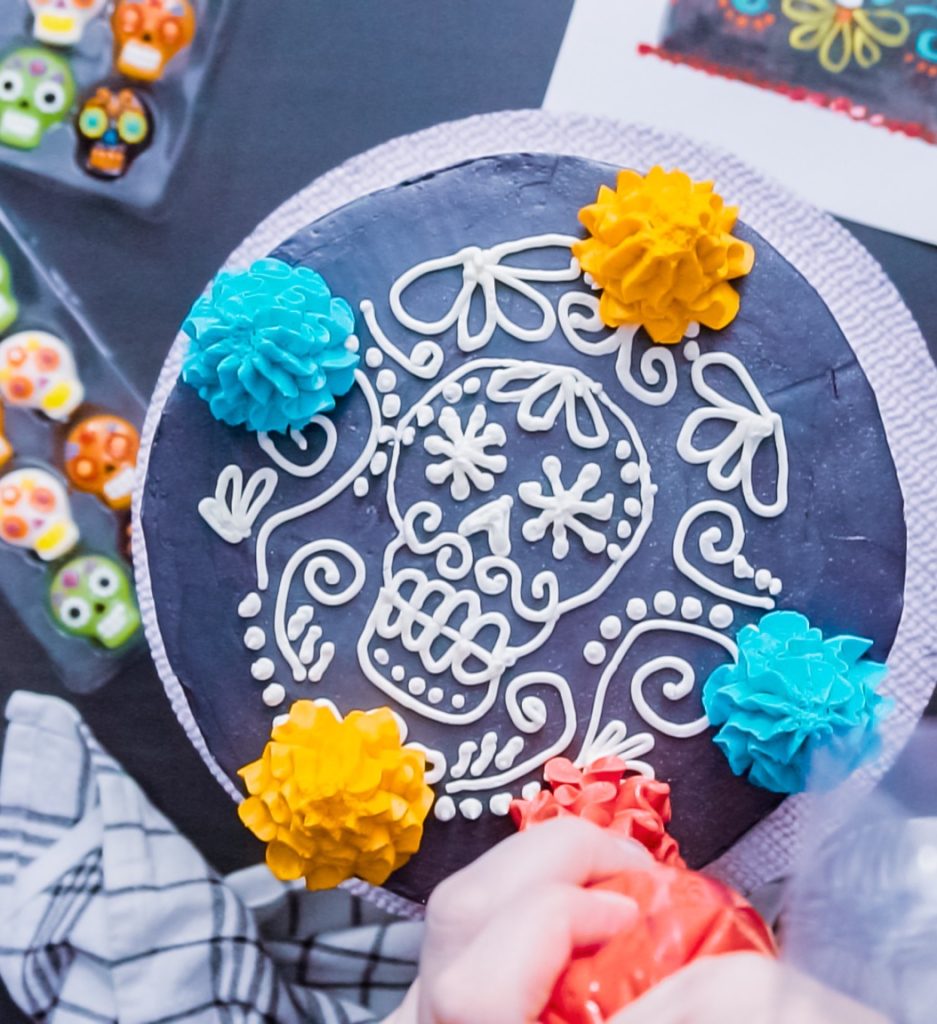
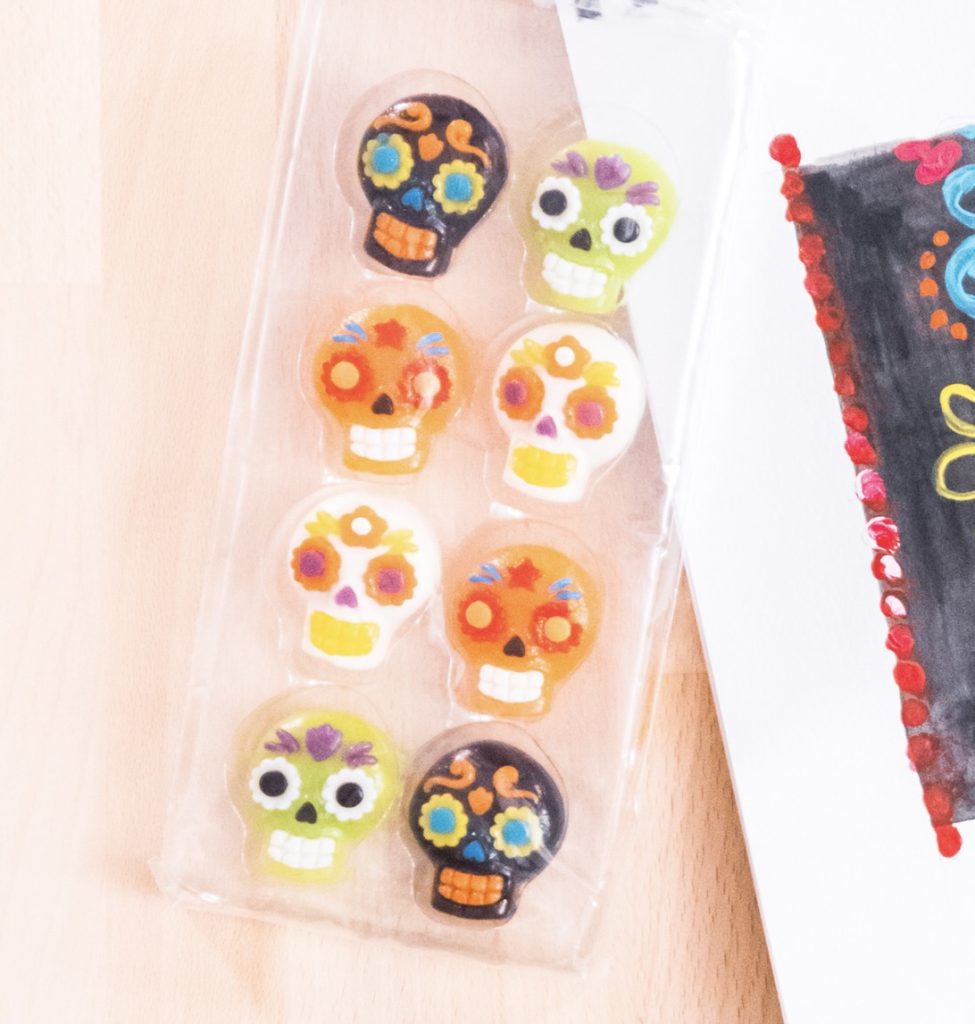
- Add the candy sugar skulls. Finish decorating your cake by adding the candy sugar skulls placing them in between the frosting swirls.
Tips for Making the Best Day of the Dead Cake
Here are some simple tips to help you make a great layered cake:
- Accurate Flour Measurement: To get the right amount of flour, it’s best to use a kitchen scale. If you don’t have one, just fluff up the flour with a spoon in the container, then spoon it into your measuring cup, and level it off with a knife. This prevents you from using too much flour, which can make your cake dry.
- Don’t Overmix: Be careful not to mix the cake batter too much. Overmixing can make your cake tough and dry. Just mix until everything is combined.
- Use Soft Butter: When making frosting, it’s important to use butter that’s at room temperature. Cold butter can make your frosting lumpy and hard to spread.
- Let the Cake Cool: Make sure your cake layers are completely cool before you start putting on the frosting. This helps the frosting stick better and gives you a smoother finish.
- Crumb Coat First: Before applying the final layer of frosting, consider doing a “crumb coat.” This is a thin layer of frosting that helps lock in any loose crumbs from the cake’s surface.
- Chill for Better Frosting: Consider putting your cake in the fridge for 15 to 30 minutes after applying the crumb coat. This will help the frosting stick to the layers better, which makes decorating easier.
Easy Day of the Dead Cake With Buttercream Frosting
Ingredients
- For the Chocolate Cake Batter:
- 4 cups all-purpose flour
- 3 1/2 cups granulated sugar
- 1 1/2 cups unsweetened cocoa powder
- 3 tsp baking powder
- 3 tsp baking soda
- 2 tsp salt
- 4 eggs
- 2 cups buttermilk
- 1 cup vegetable oil
- 4 tsp vanilla extract
- 2 cups boiling water
- For The Buttercream Frosting:
- 6 cups unsalted butter, softened
- 12 cups powdered sugar
- 1/2 cup heavy cream
- Assorted gel food colors (black, red, orange, green, blue, purple, and pink)
- For Decoration:
- 12 Sugar skull candy
- Piping bags and tips set
Instructions
Prepare The Cake Layers:
- Preheat the Oven: Preheat your oven to 350°F (175°C). Grease and flour five 9-inch round cake pans. You can also line the bottoms with parchment paper for easier removal.
- Sift Dry Ingredients: In a large mixing bowl, sift together the all-purpose flour, unsweetened cocoa powder, granulated sugar, baking powder, baking soda, and salt. Sifting helps remove lumps and ensures even mixing.
- Combine Wet Ingredients: In another bowl, whisk together the eggs, buttermilk, vegetable oil, and vanilla extract until well combined.
- Mix Wet and Dry Ingredients: Gradually add the wet ingredients to the dry ingredients, mixing until the batter is smooth and well combined. Be sure not to overmix; just mix until the ingredients are incorporated.
- Add Boiling Water: Carefully add the 2 cups of boiling water to the batter and mix until it’s fully incorporated. The batter will be thin, but this is normal.
- Fill Cake Pans: Divide the cake batter evenly among the prepared cake pans. Smooth the tops with a spatula to ensure even baking.
- Bake: Place the cake pans in the preheated oven and bake for approximately 30-35 minutes, or until a toothpick inserted into the center of each cake comes out clean. Baking times may vary slightly depending on your oven, so keep a close eye on the cakes.
- Cool: Remove the cakes from the oven and let them cool in the pans for about 10 minutes. Then, transfer them to a wire rack to cool completely.
Make The Buttercream Frosting:
- In a large mixing bowl, beat softened butter until creamy.
- Gradually add powdered sugar and heavy cream, mixing until the frosting is smooth and fluffy.
- Divide the frosting into seven bowls: one for black frosting, one for white frosting and five for tinting with the gel food colors to match the cake layers (I used pink, green, orange, purple and red)
Assemble The Cake:
- Start with one black cake layer as the base.
- Spread a layer of frosting on top of it.
- Place the next black cake layer on top and repeat until all layers are stacked, creating a stunning contrast between the black cake and colorful frosting.
Crumb Coat And Chill:
- Apply a thin layer of black frosting all around the cake (this is the crumb coat).
- Chill the cake for 30 minutes to set the frosting.
Frost With Black Buttercream:
- Cover the entire cake with black buttercream frosting to create a sleek, dark canvas.
Decorate Your Day Of The Dead Cake:
- Make the white designs on the top of the cake: Base yourself on the design you created on paper. For this design use the white buttercream and a small round piping tip.Start by piping the outer shape of the sugar skull in the center of your cake. Then decorate the inside of the sugar skull adding eyes, a mouth and noise as well as some decorations like scrolls, dots and flowers. Then decorate around the sugar skull design again using different designs like flowers, scrolls, dots and stars.
- Pipe the border on the base of your cake. This cake has a pearl border but you can choose other types of borders like a shell border or a rosette border.I like to put the border before I decorate around the cake so that I don’t risk messing up any of the decorations if I brush against the cake with my piping bag. The border is a lot easier to fix if there is a mishap.
- Decorate the sides of your cake. To decorate the sides of the cake use buttercream in different colors. As you did with the top of the cake you will want to have your design on paper first so that you can follow it.
Start placing sugar skull cake decorations. Place one on the front of the cake, another on the back of the cake and one on each side. These small sugar skull cake decorations served as the starting point and the focal point for the rest of the decorations. - Pipe your decorations. Use your sugar skulls as the focal points then decorate around them using different piping techniques including dots, rossetts, stars, flowers and combining them with loose scrolls and flower drawings.
- Finish decorating the top of your cake. Pipe large swirls on the top. Using different colors of buttercream frosting pipe large swirls or stars. Leave some spade in between them. Don’t worry if part of the swirls covers some of the design on the top of your cake.
- Add the candy sugar skulls. Finish decorating your cake by adding the candy sugar skulls placing them in between the frosting swirls.
Nutrition Information:
Yield: 25 Serving Size: 1Amount Per Serving: Calories: 934Total Fat: 57gSaturated Fat: 30gTrans Fat: 0gUnsaturated Fat: 24gCholesterol: 155mgSodium: 469mgCarbohydrates: 103gFiber: 2gSugar: 83gProtein: 5g
More Day of the Dead Articles
If you’re looking for more Day of the Dead activities for kids to enjoy together as a family you can check out some of my other Day of the Dead articles:
Best Day of the Dead Dessert Recipes
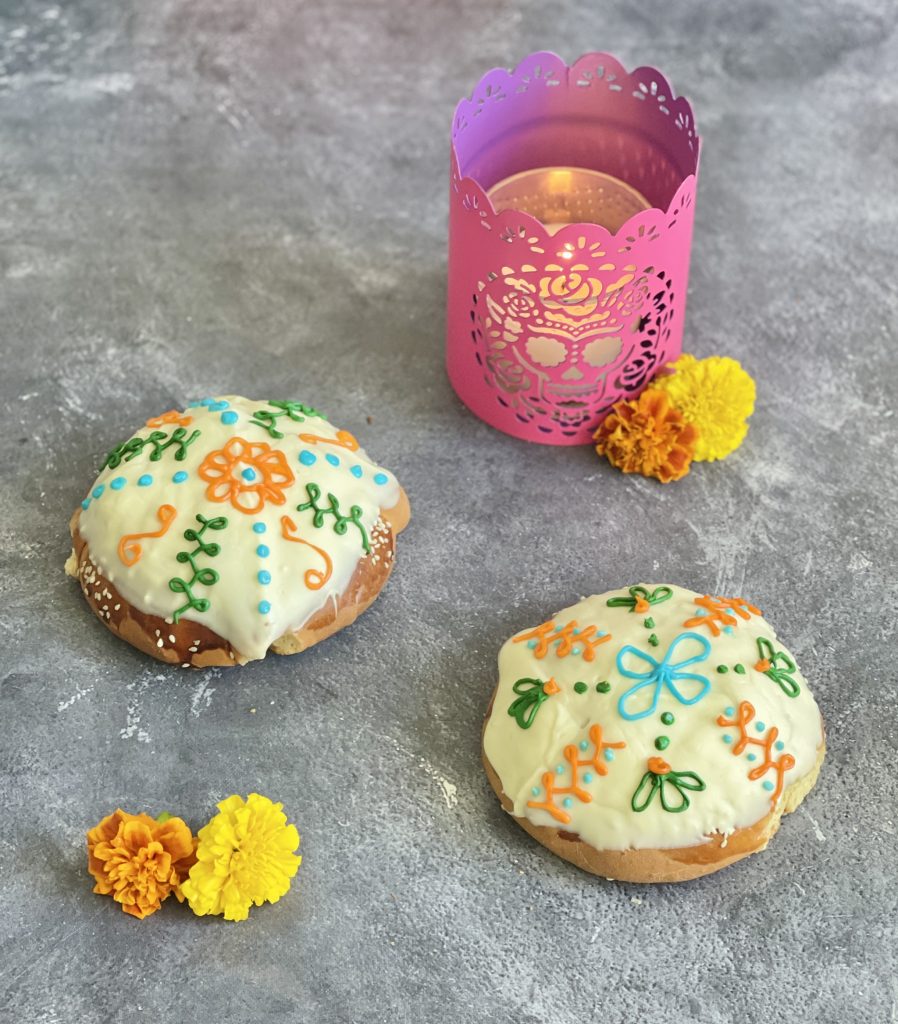
The Best Day of the Dead Desserts has everything you need to celebrate with tasty treats. Make pumpkin spice cheesecake sugar skulls to combine fall flavors with Day of the Dead traditions. For something fun and kid-friendly, try the skull pull-apart pumpkin bread that’s easy to share. And for a more traditional option, sugar skull decorated pan de muerto is a must-have for any celebration.
Best Day Of The Dead Movies For Kids
Watching a Day of the Dead movie is a great option if you’re looking for ways to learn about the Day of the Dead or are looking for ideas to celebrate Dia de los Muertos with kids. Here you will find the best Day of the Dead movies from animated movies and short films to live action Dia de los Muertos movies.

Day Of The Dead White Chocolate Covered Strawberry Skulls
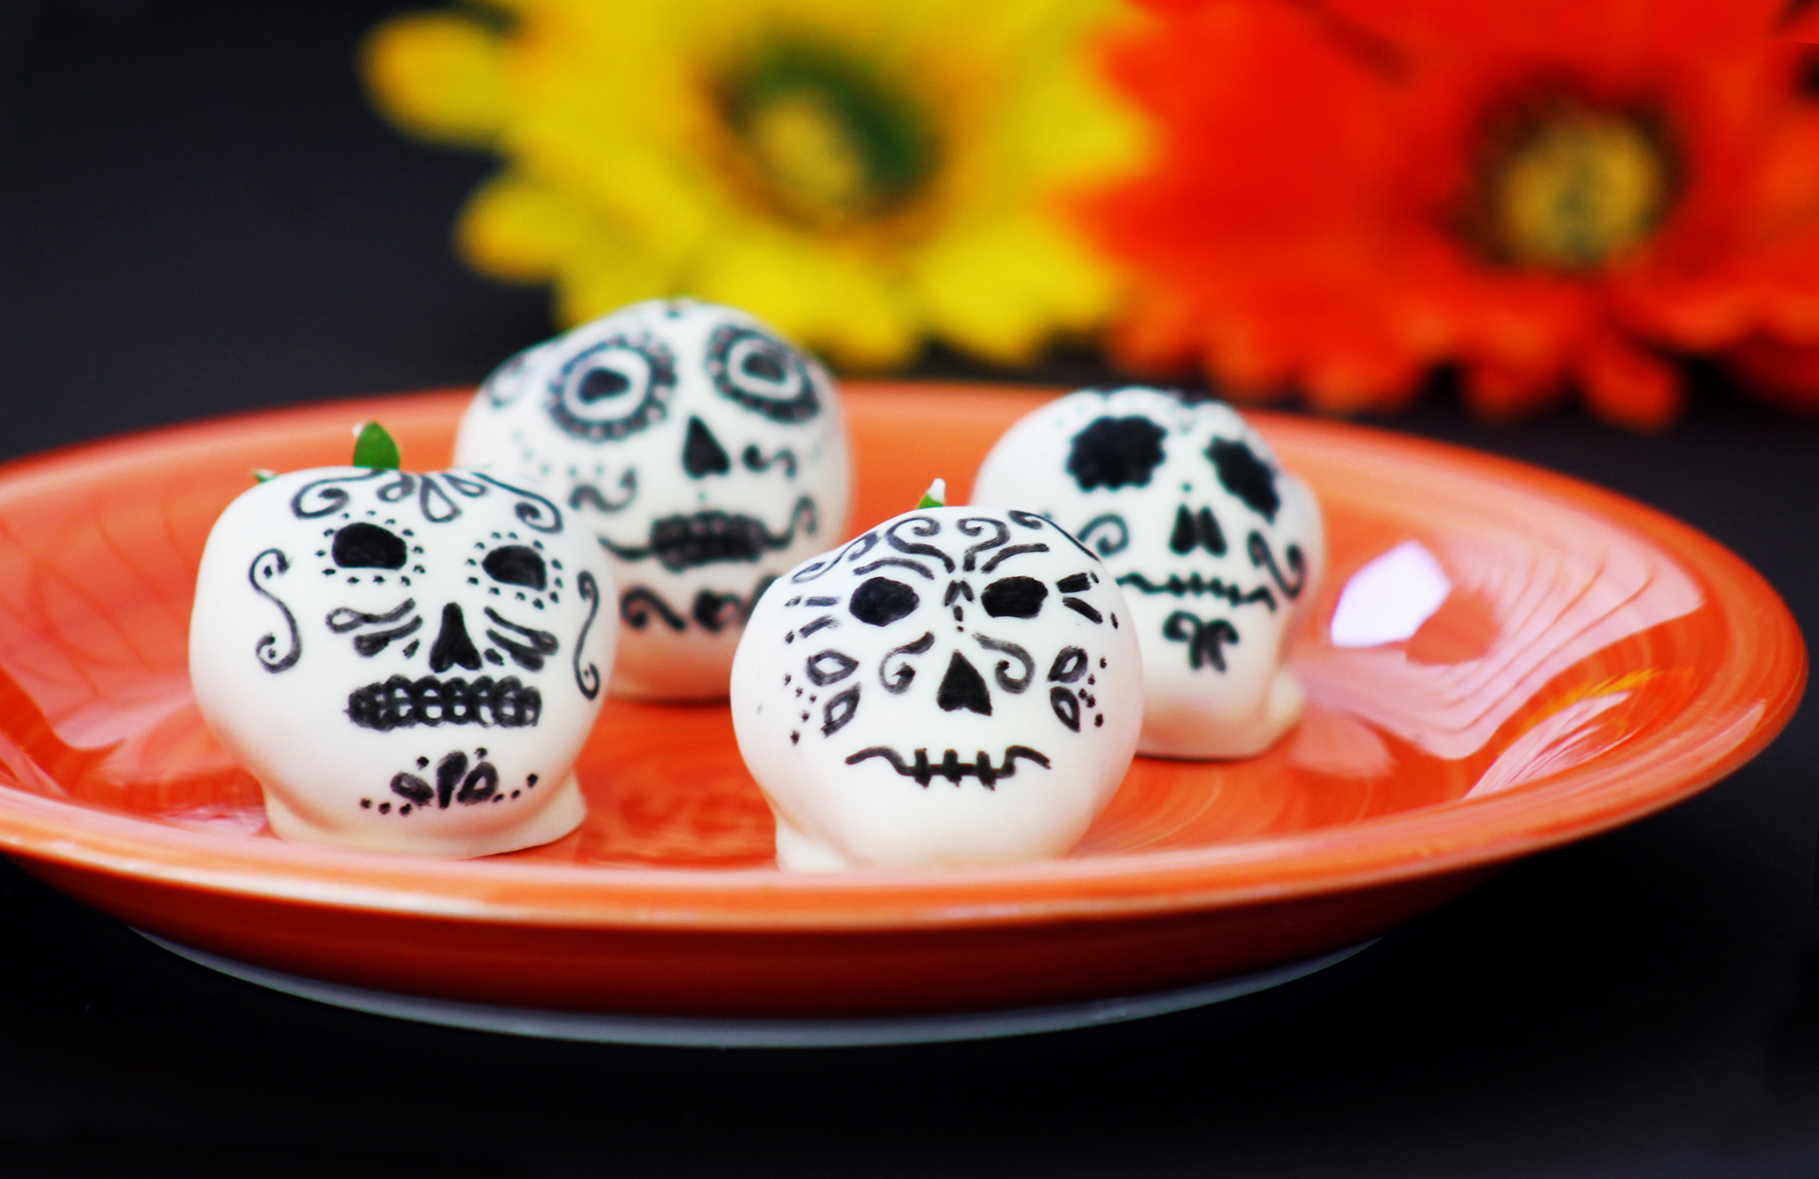
These yummy treats mix ripe strawberries’ sweetness with creamy white chocolate, shaped like fancy sugar skulls. Whether it’s Day of the Dead or you just want a special and tasty dessert, these edible artworks are a great pick for your sweet celebrations.
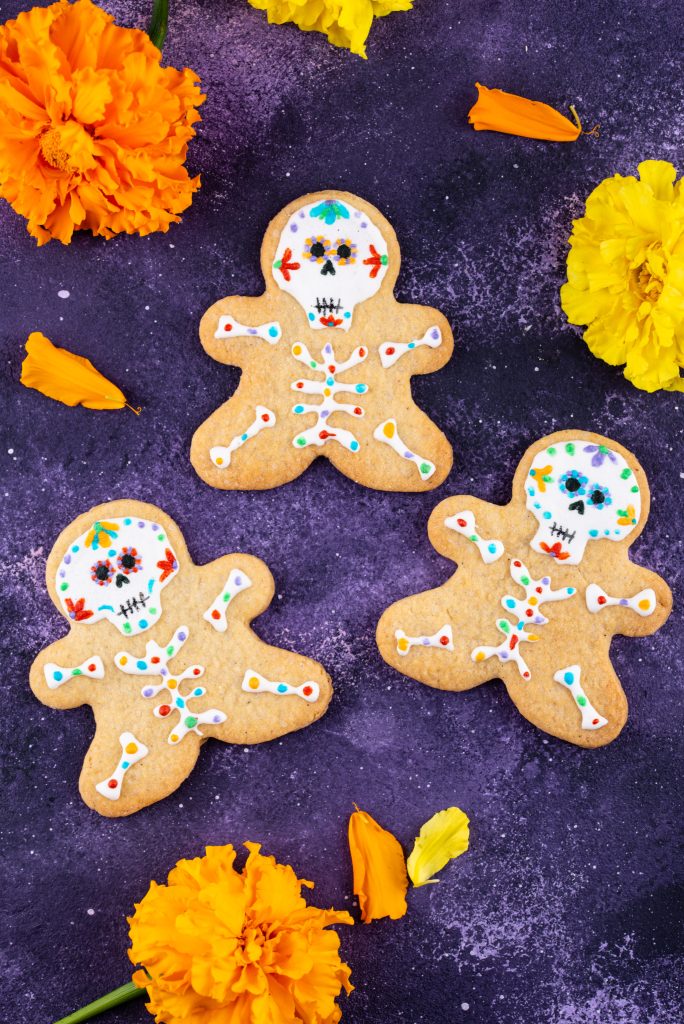
Dia de los Muertos Skeleton Cookies
These fun and easy Day of the Dead cookies are a great way to celebrate the holiday with a creative twist. Made from simple sugar cookie dough, they’re decorated with icing to resemble cute and Dia de Muertos skeletons. These cookies are perfect for getting kids involved in the kitchen and adding a festive touch to your Day of the Dead celebration.
Healthy Day Of The Dead Sugar Skull Fruit Pizza Dessert
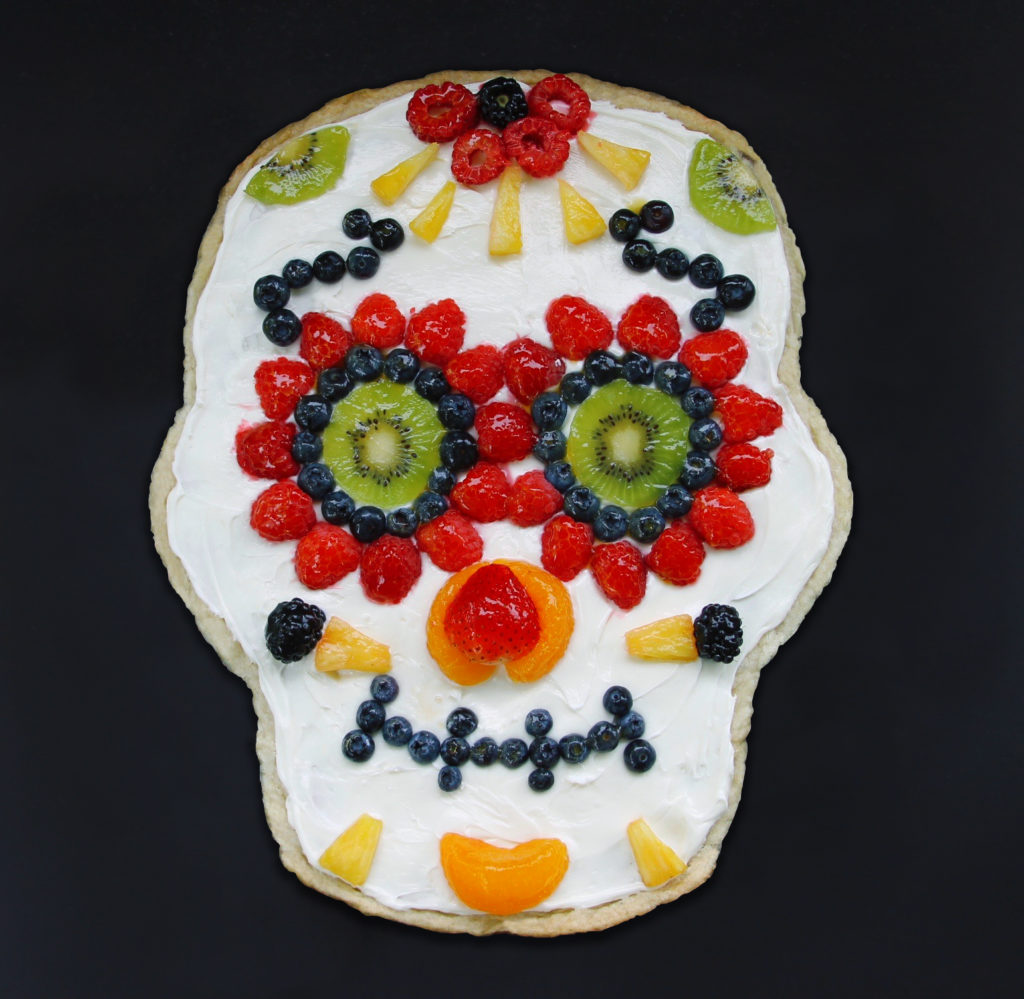
This Day of the Dead sugar skull fruit pizza or fruit dessert pizza is the perfect sweet treat for your Halloween party. Loaded with fresh fruit and with a yogurt-based cream cheese frosting it’s the kind of nutritious Halloween treat you want your kids to eat! This fun treat was inspired by the sugar skull designs that are traditional to the celebrations for Day of the Dead in Mexico.
