This post is also available in:
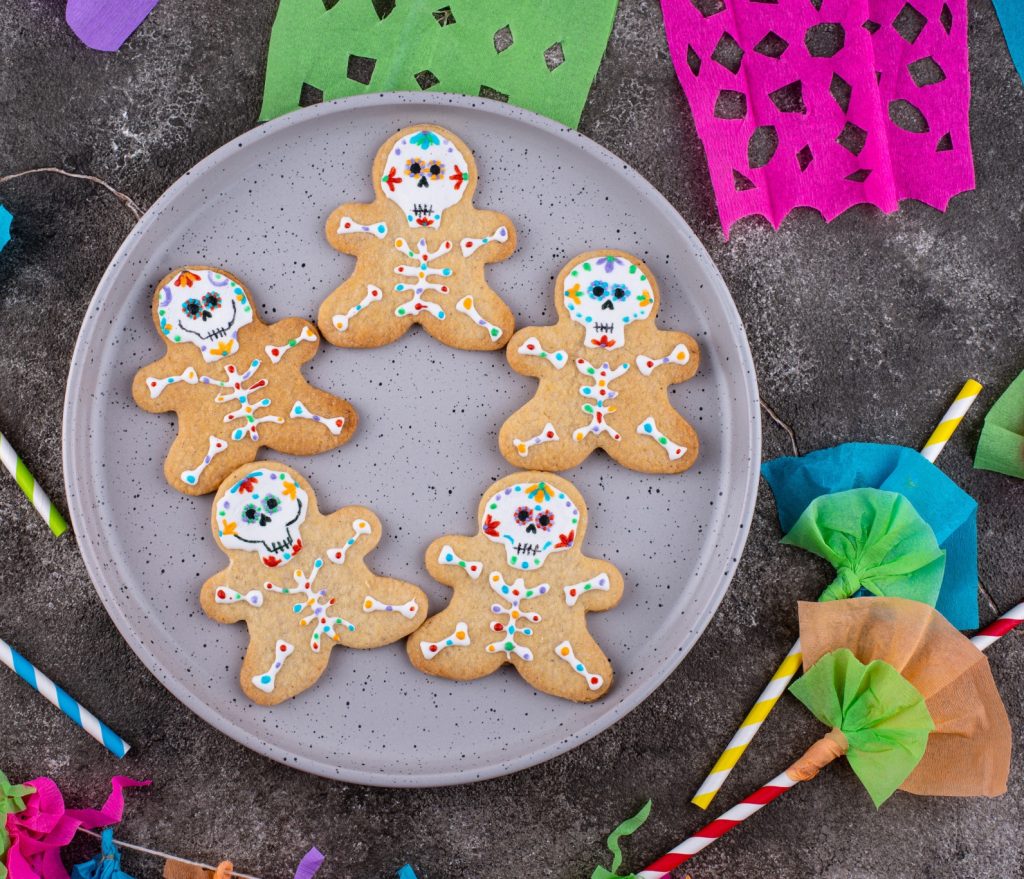
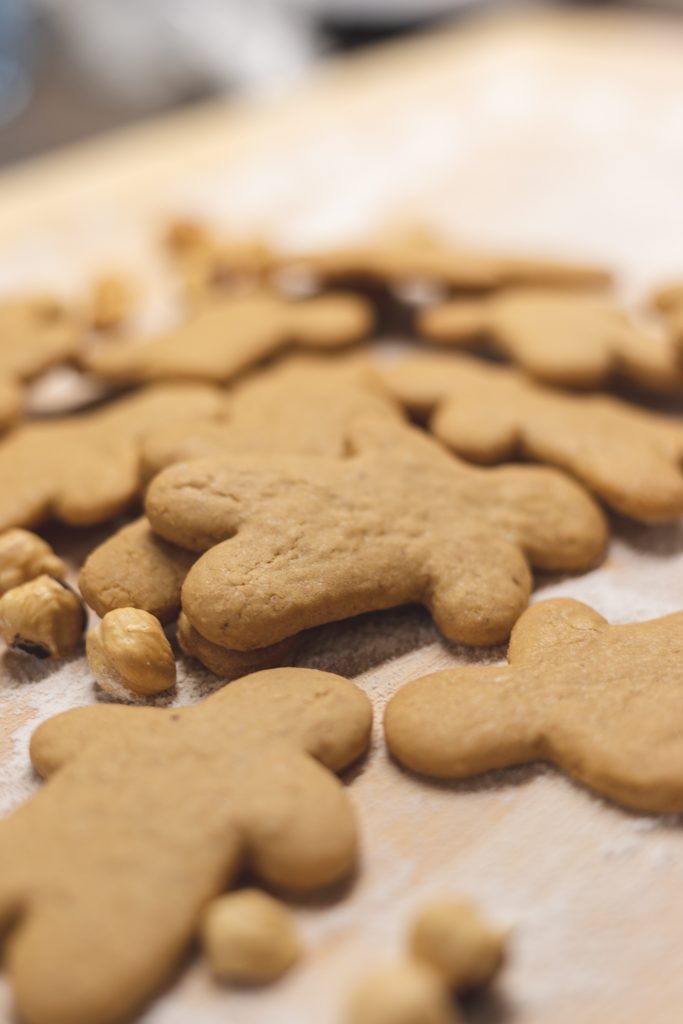
This recipe for Day of the Dead cookies is so easy to make. A twist on the traditional gingerbread men, these skeleton cookies are so much fun to bake and decorate and delicious, too. They’re perfect for enjoying with a cup of Mexican hot chocolate or a cool glass of horchata.
Delicious and Easy Day of the Dead Cookies
Instead of gingerbread I like to make these cookies inspired by the biscochitos cookies that are traditional to New Mexico and parts of Mexico. The biscochitos are sugar cutout cookies with a hint of anise and orange, giving them a distinctive, festive, and simply irresistible taste. If you do not like anise, you can use your favorite sugar cut-out cookie or gingerbread recipe instead.
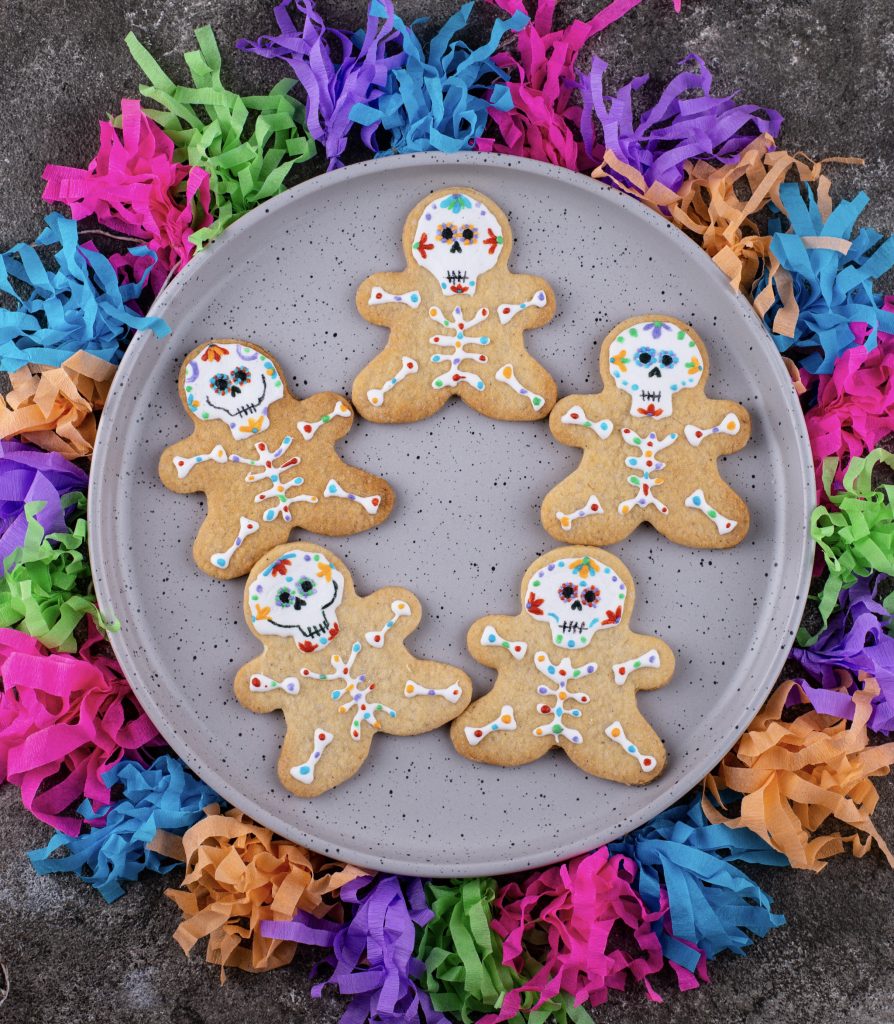
Whether you celebrate Halloween or, Day of the Dead, or both, these skeleton-decorated cut-out cookies are perfect for either occasion. We made these last year for our Day of the Dead party, and they were an absolute hit. We’re even putting some on our ofrenda next to the pan de muerto, the sugar skulls, and the marigolds because I know my grandma would have loved these.
A Day of the Dead Recipe to Make With Kids
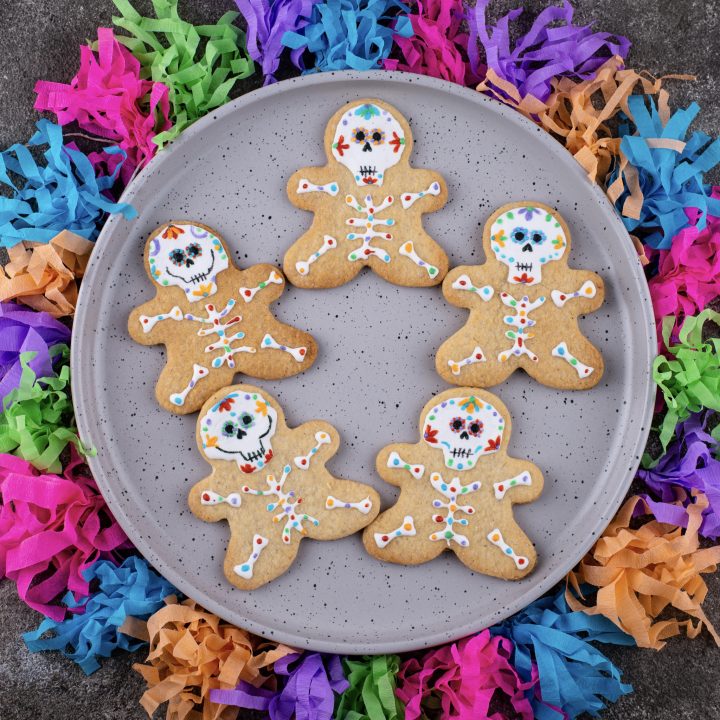
Skeleton cookies may not be a traditional Day of the Dead food, but they are a fun Dia de los Muertos recipe for kids. You can even make these ahead of time and have kids decorate them; they’re the perfect Day of the Dead activity for kids at home or in the classroom.
The Meaning of Day of the Dead Skeletons and Skulls
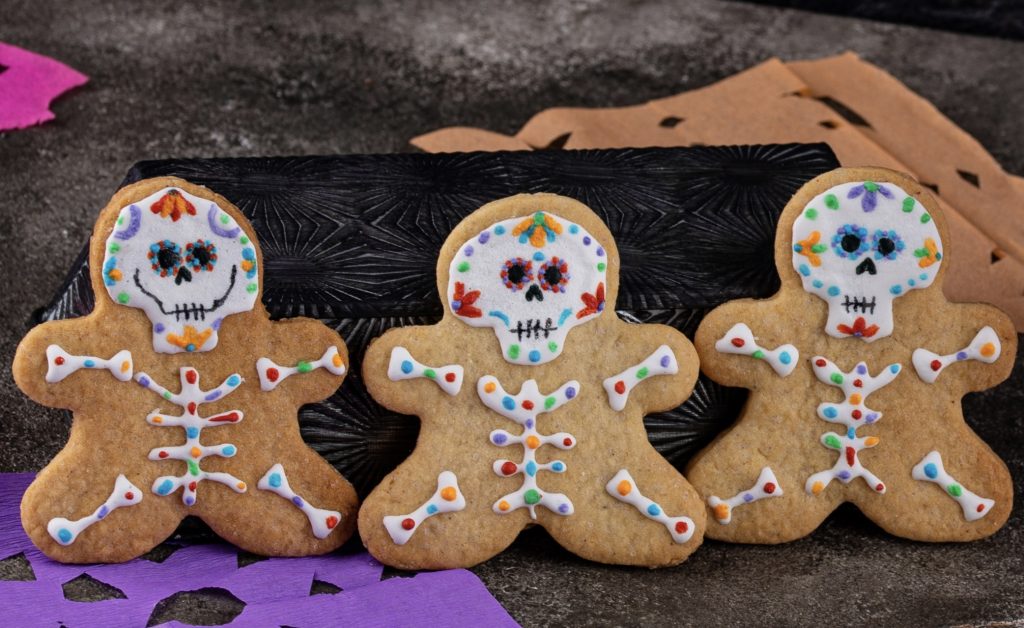
Skeletons, skulls, and bones are popular spooky symbols for Halloween. They are also essential symbols for Día de Muertos (Day of the Dead) – a Mexican celebration that’s becoming more popular in the U.S. thanks to Day of the Dead movies like Coco and Spectre. But during Día de Muertos, these skeletons and skulls, known as calaveras in Spanish, aren’t meant to be scary. They’re a way to celebrate life even in the face of death. The idea is that when we acknowledge our mortality, we can appreciate life more. Calaveras uses humor and funny skeleton characters to honor the deceased and the living by poking fun at death and making death seem like something playful instead of scary.
Day of the Dead Cookies: Easy Skeleton Cookies Recipe
Ingredients
Ingredients for the cookies
- 2 1/2 cups all-purpose flour
- 1/2 teaspoon salt
- 1/2 teaspoon baking powder
- 1 cup (2 sticks) unsalted butter, at room temperature
- 1 cup granulated sugar
- 1 teaspoon anise extract or anise seeds
- 1 teaspoon of cinnamon
- 1 large egg
- 1/4 orange juice
Equipment and other supplies
- Royal Icing Mix (you can use your favorite royal icing recipe instead)
- Piping bags for the royal icing
- Food coloring pens or markers for decorating the cookies
- Gingerbread man cookie cutter
Instructions
Making the dough
- Whisk together the flour, salt, and baking powder in a medium-sized bowl. Set this dry mixture aside.
- In a separate large mixing bowl, beat the butter and sugar until the mixture becomes creamy and light.
- Add the anise extract and cinnamon to the butter-sugar mixture and mix until well combined.
- Beat in the egg until the mixture is smooth.
- Slowly add the orange juice to the wet mixture and continue to mix until everything is well incorporated.
- Gradually add the dry mixture to the wet mixture until the dough comes together. If the dough is too sticky, you can add a bit more flour.
- Divide the dough into two equal portions and shape them into two disks. Wrap each disk in plastic wrap and refrigerate them for at least 30 minutes (or overnight) to firm up.
Cutting the cookie skeletons
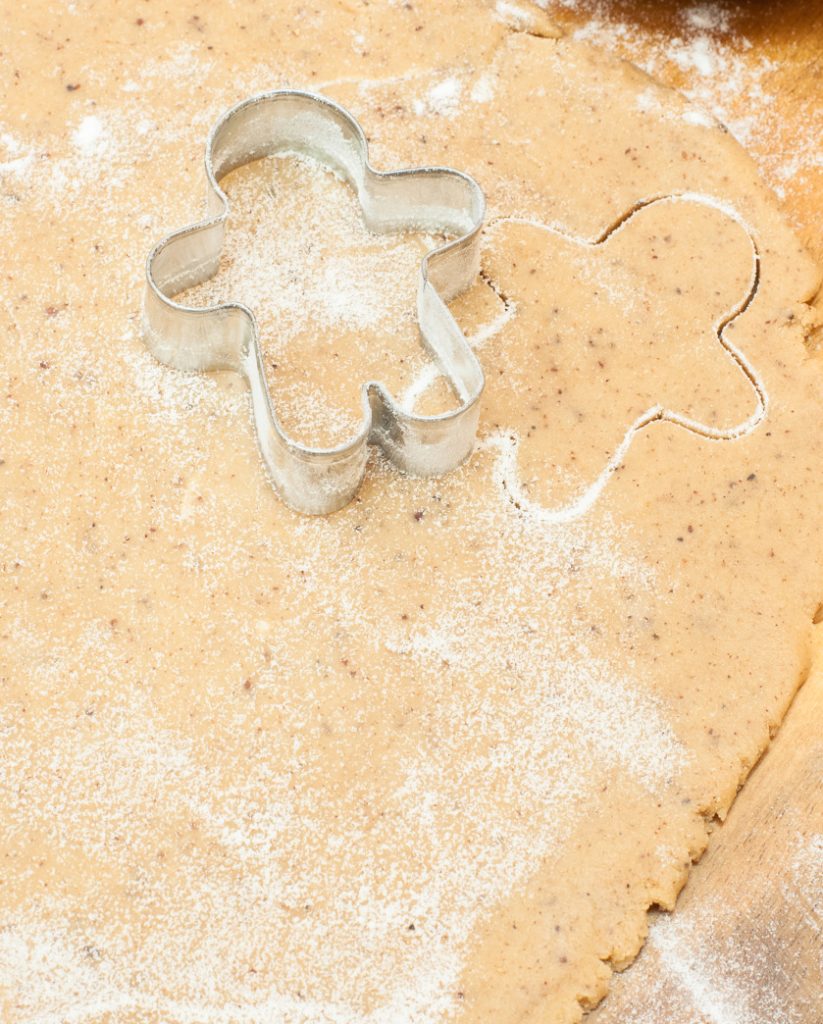
- Roll out one disk of dough on a lightly floured surface to about 1/4 inch thickness.
- Use cookie cutters to cut the dough into desired shapes.
- Place the cutout cookies on the prepared baking sheet, leaving some space between each.
Baking the cookies
- Preheat your oven to 350°F (175°C) and line a baking sheet with parchment paper.
- Bake the cookies in the oven for 10-12 minutes or until they are lightly golden on the edges.
- Remove the cookies from the oven and allow them to cool on the baking sheet for a few minutes before transferring them to a wire rack to cool completely.
- Repeat the rolling and cutting process with the second disk of dough.
Decorating the cookies
- Start by making the royal icing according to the package instructions. Ensure it has a thick but spreadable consistency.
- If needed, thin the royal icing slightly by adding a few drops of water at a time. Stir well after each addition until the icing reaches a thickness similar to that of thick yogurt. This will make it easier to pipe and create designs.
- Transfer the thinned royal icing into an icing piping bag fitted with a small round tip. Twist the top of the bag to secure the icing.
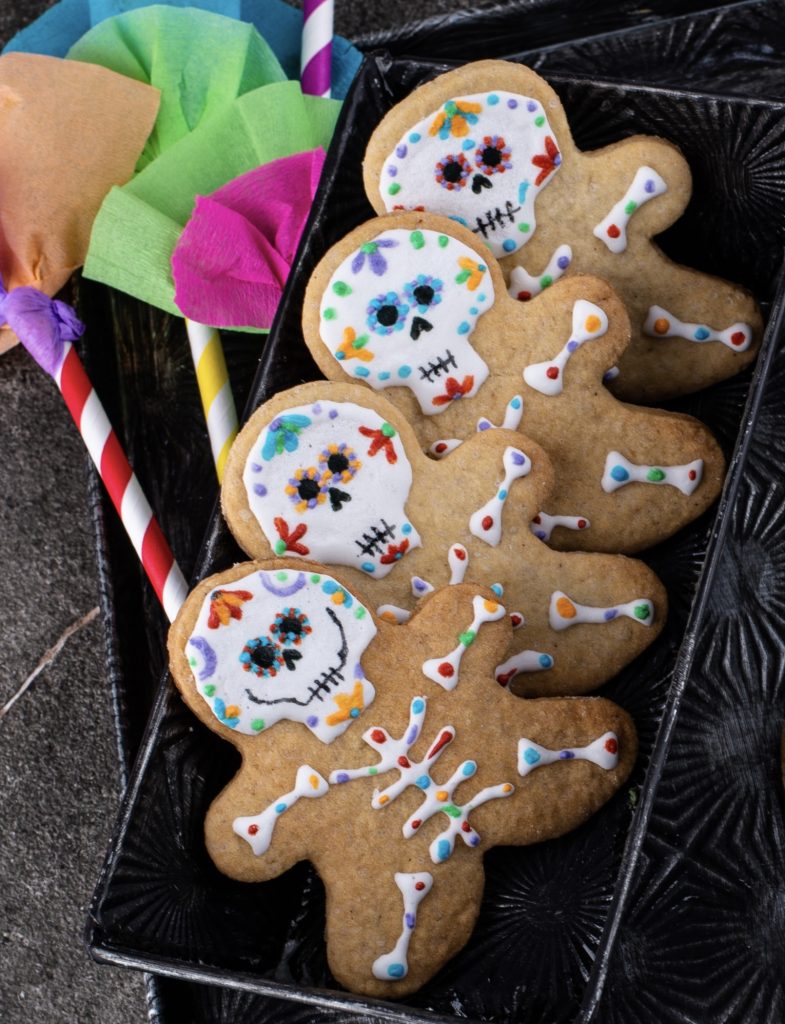
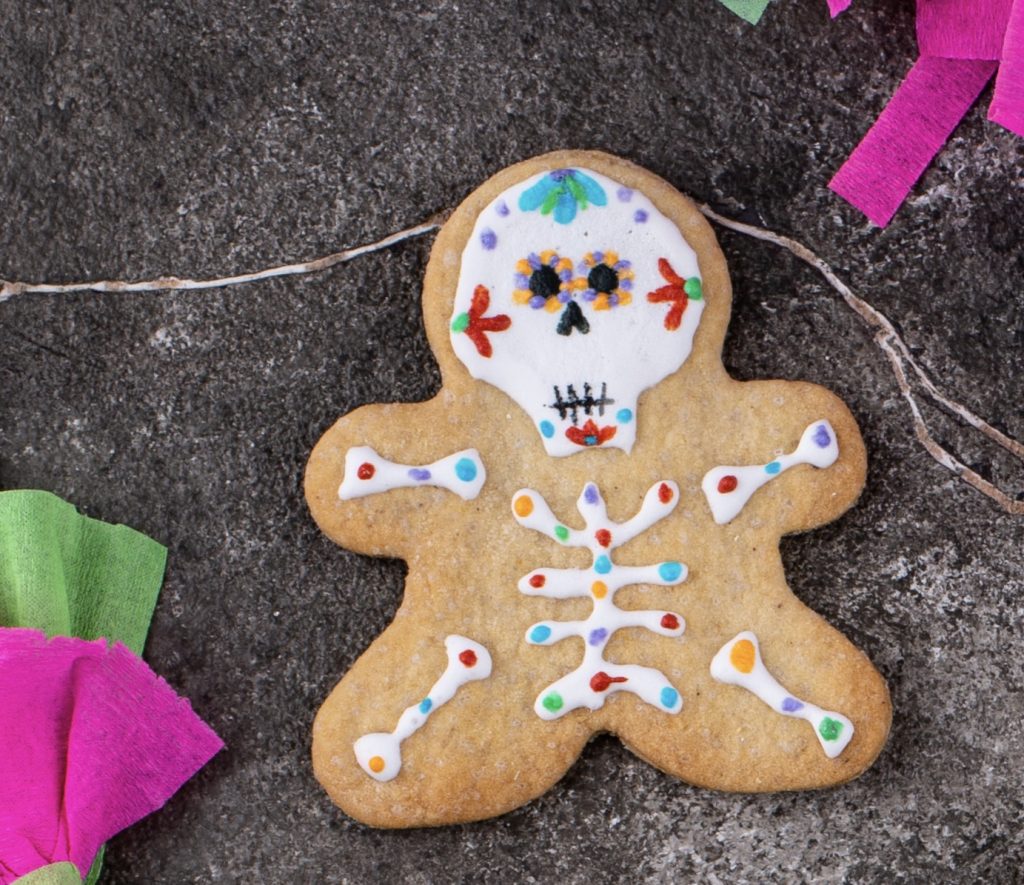
- Pipe the head, rib cage, and bones.
- Allow the piped icing to set for a few hours or overnight. This will ensure the icing hardens and provides a smooth surface for your food markers.
- Once the icing has been set, you can use colored food markers to add intricate details and decorations to your cookies. Get creative and bring your designs to life with the markers.
- Let your decorated cookies dry completely before handling or storing them. This ensures that the food marker ink is set properly.
Day of the Dead Cookies: Easy Skeleton Cookies Recipe
Ingredients
- Ingredients for the cookies
- 2 1/2 cups all-purpose flour
- 1/2 teaspoon salt
- 1/2 teaspoon baking powder
- 1 cup (2 sticks) unsalted butter, at room temperature
- 1 cup granulated sugar
- 1 teaspoon anise extract or anise seeds
- 1 teaspoon of cinnamon
- 1 large egg
- 1/4 orange juice
Instructions
- Whisk together the flour, salt, and baking powder in a medium-sized bowl. Set this dry mixture aside.
- In a separate large mixing bowl, beat the butter and sugar until the mixture becomes creamy and light.
- Add the anise extract and cinnamon to the butter-sugar mixture and mix until well combined.
- Beat in the egg until the mixture is smooth.
- Slowly add the orange juice to the wet mixture and continue to mix until everything is well incorporated.
- Gradually add the dry mixture to the wet mixture until the dough comes together. If the dough is too sticky, you can add a bit more flour.
- Divide the dough into two equal portions and shape them into two disks. Wrap each disk in plastic wrap and refrigerate them for at least 30 minutes (or overnight) to firm up.
Making the dough
Cutting the skeletons cookies
- Roll out one disk of dough on a lightly floured surface to about 1/4 inch thickness.
- Use cookie cutters to cut the dough into desired shapes.
Place the cutout cookies on the prepared baking sheet, leaving some space between each.
Baking the cookies
- Preheat your oven to 350°F (175°C) and line a baking sheet with parchment paper.
- Bake the cookies in the oven for 10-12 minutes or until they are lightly golden on the edges.
- Remove the cookies from the oven and allow them to cool on the baking sheet for a few minutes before transferring them to a wire rack to cool completely.
- Repeat the rolling and cutting process with the second disk of dough.
Decorating the cookies
- Start by making the royal icing according to the package instructions. Ensure it has a thick but spreadable consistency.
- If needed, thin the royal icing slightly by adding a few drops of water at a time. Stir well after each addition until the icing reaches a thickness similar to that of thick yogurt.
- This will make it easier to pipe and create designs.
- Transfer the thinned royal icing into an icing piping bag fitted with a small round tip. Twist the top of the bag to secure the icing.
- Pipe the head, rib cage, and bones.
- Allow the piped icing to set for a few hours or overnight. This will ensure the icing hardens and provides a smooth surface for your food markers.
- Once the icing has been set, you can use colored food markers to add intricate details and decorations to your cookies. Get creative and bring your designs to life with the markers.
- Let your decorated cookies dry completely before handling or storing them. This ensures that the food marker ink is set properly.
Notes
Equipment and other supplies
- Royal Icing Mix (you can use your favorite royal icing recipe instead)
- Piping bags for the royal icing
- Food coloring pens or markers for decorating the cookies
- Gingerbread man cookie cutter
Nutrition Information:
Yield: 24 Serving Size: 1Amount Per Serving: Calories: 95Total Fat: 1gSaturated Fat: 0gTrans Fat: 0gUnsaturated Fat: 1gCholesterol: 9mgSodium: 65mgCarbohydrates: 20gFiber: 0gSugar: 9gProtein: 2g
Tips for decorating cookies with food coloring pens
- Ensure your surface is completely dry before using the food coloring pens. For cookies with flooded royal icing, you must allow them to dry overnight.
- Avoid layering colors unless you’re going for a specific effect. Keep in mind that the bottom color may show through. If needed, use black food coloring as it can effectively cover other colors. Many decorators choose to outline with black last for this reason.
- When switching between colors, give the first color approximately ten minutes to set. This prevents accidentally picking up another color with your food coloring pen and helps prevent bleeding between colors.
- Use gentle pressure with your markers: Applying a light touch when using the markers is essential. Excessive pressure can cause the marker’s tip to fray, leading to imprecise lines or even damaging the cookie’s surface. Handle the markers delicately for better control.
Other Day of the Dead Recipes to Make With Kids
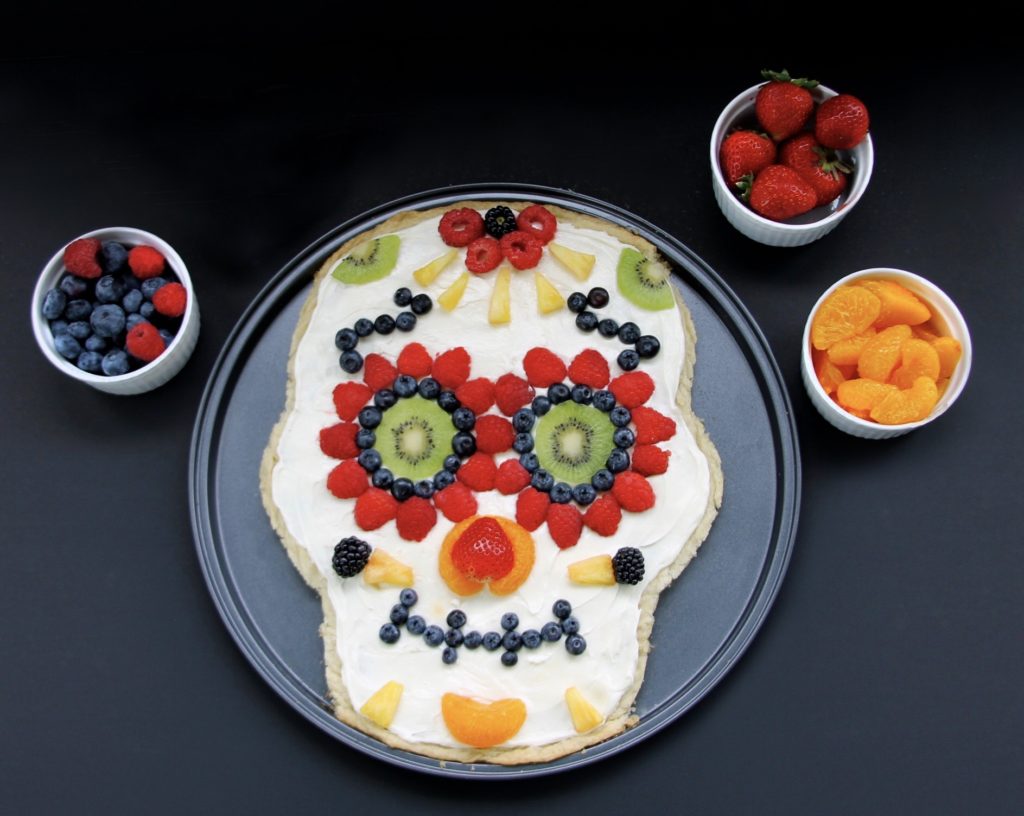
Healthy Day Of The Dead Sugar Skull Fruit Pizza Dessert
If you’re looking for a Halloween fruit pizza this Day of the Dead sugar skull fruit pizza is the perfect sweet treat for your Halloween party. With fresh fruit and with a yogurt-based cream cheese frosting it’s the kind of nutritious Halloween dessert pizza you want your kids to eat!
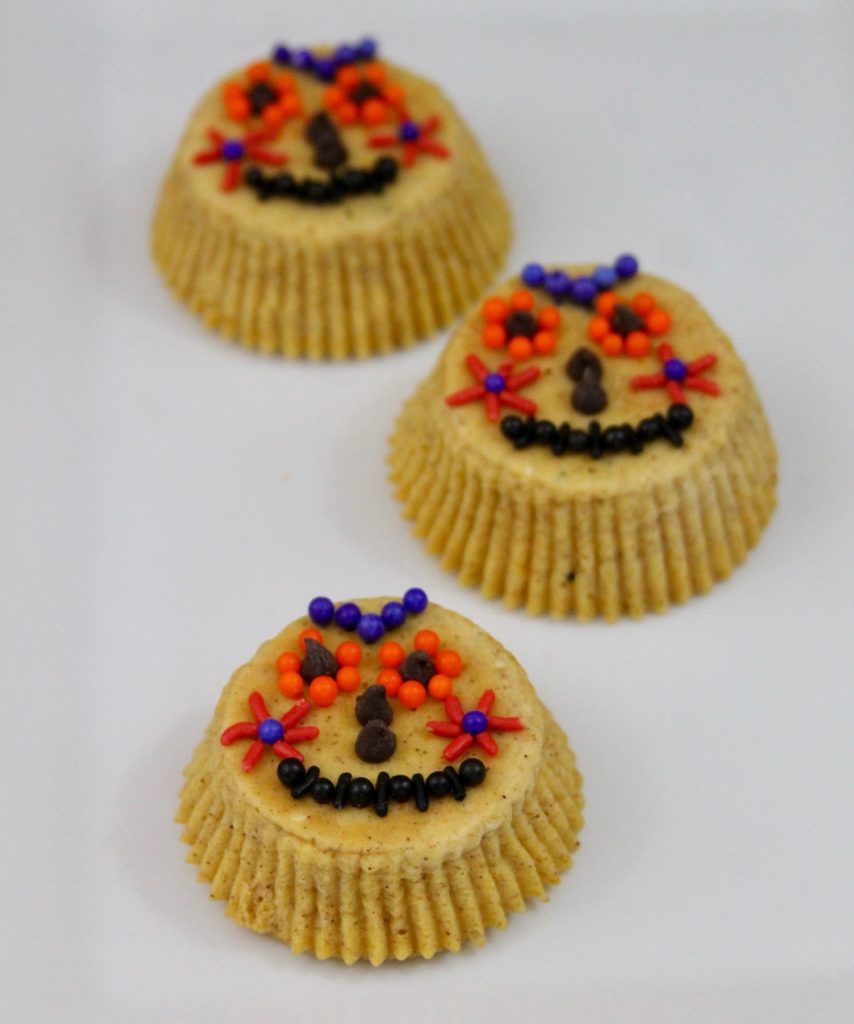
Day Of The Dead Pumpkin Spice Cheesecake Sugar Skulls
These pumpkin spice cheesecake skulls are a fun and delicious Dia de los Muertos treat to make and enjoy with family. They also make a fun kid-friendly Halloween treat and are perfect for adding to your Halloween party spread.
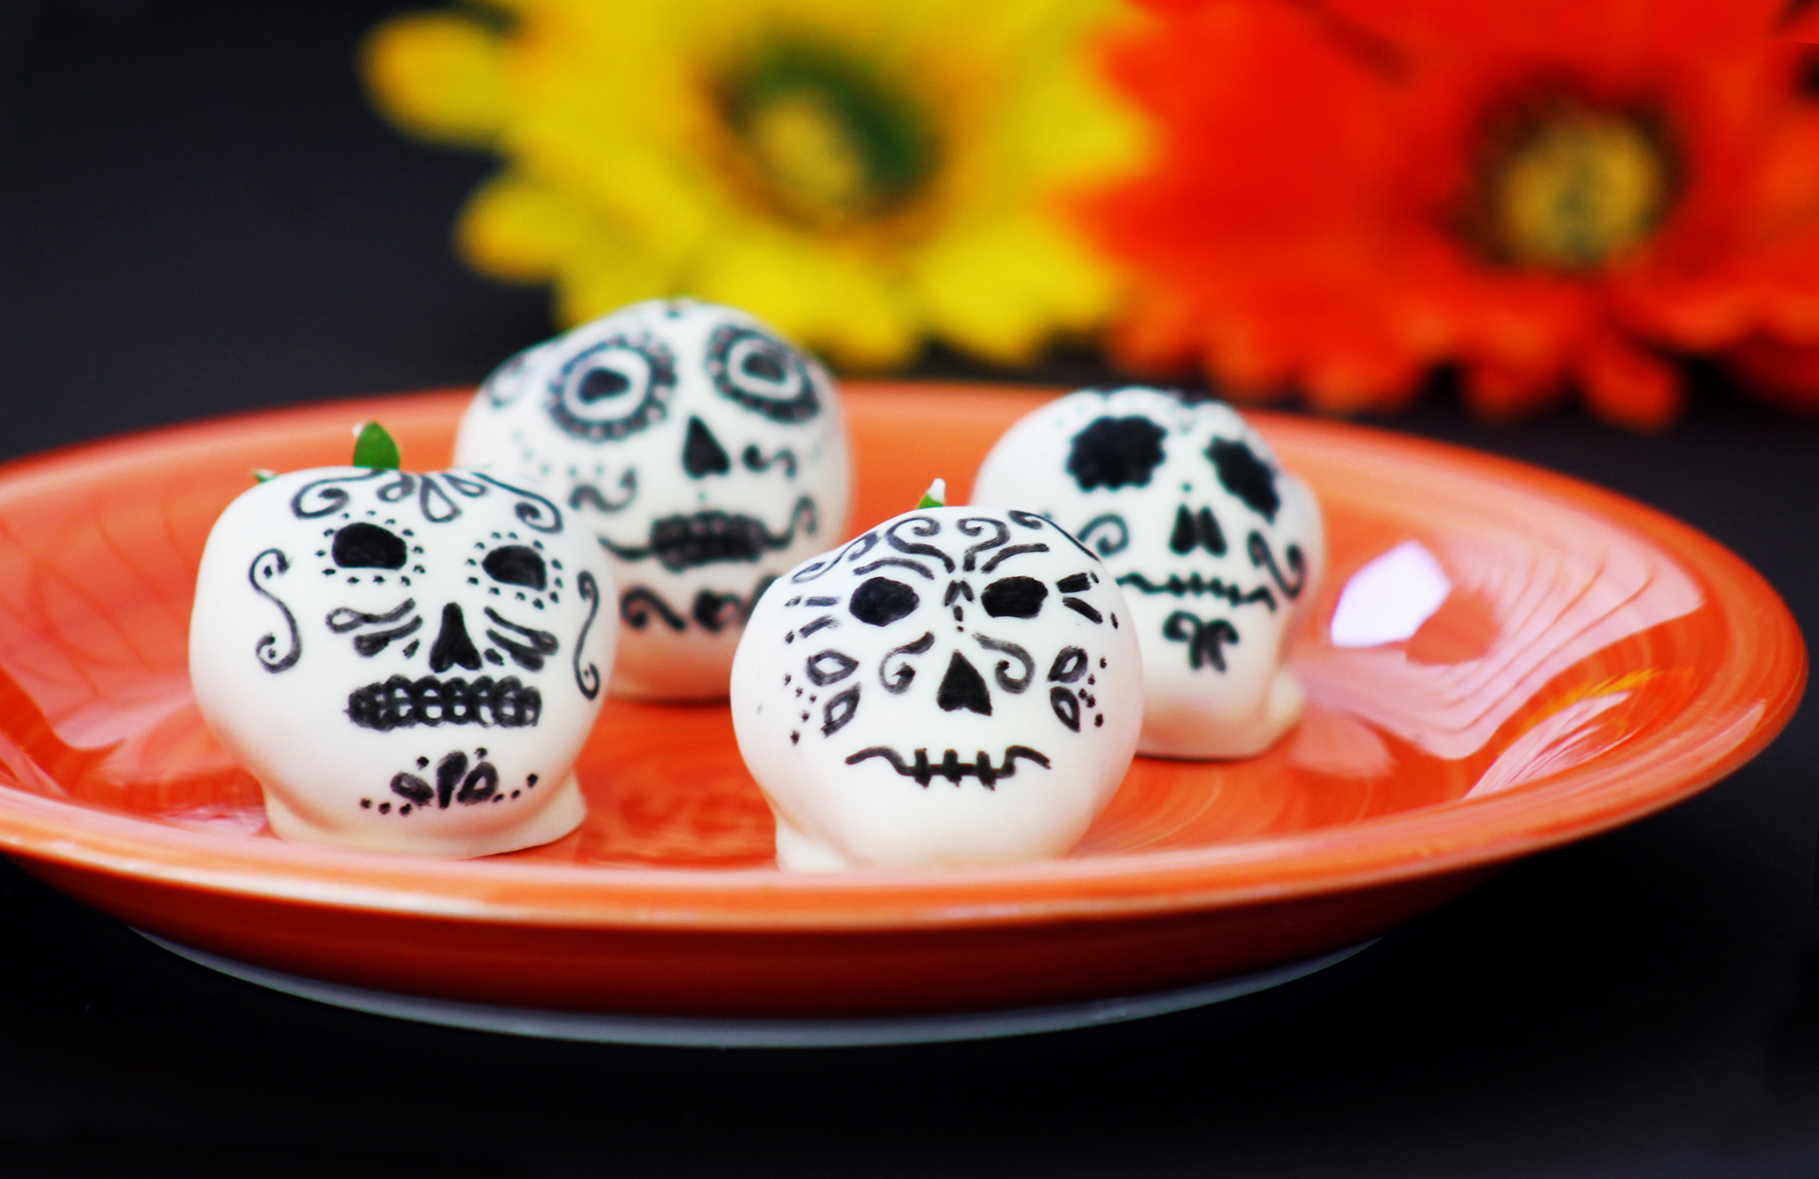
Day Of The Dead White Chocolate Covered Strawberry Skulls
These yummy treats mix ripe strawberries’ sweetness with creamy white chocolate, shaped like fancy sugar skulls. Whether it’s Day of the Dead or you just want a special and tasty dessert, these edible artworks are a great pick for your sweet celebrations.

Through her writing, Paula helps travelers discover Guatemala beyond the typical tourist route with practical advice, local recommendations, and authentic experiences that connect visitors with the country’s people, culture, and traditions.
Planning a trip to Guatemala? Paula offers personalized Guatemala itinerary planning and trip consultation services tailored to your interests, travel style, and budget. Contact her at [email protected] to learn more.
- Best Antigua Guatemala Wedding Venues: Ruins to Hotels - July 13, 2026
- 2 Week Guatemala Itinerary: A Local’s 14-Day Route Beyond the Usual Stops - July 1, 2026
- Livingston, Guatemala: A Complete Travel Guide - June 25, 2026

